This is the first of several posts that will cover a project I just completed. The info provided is free to use and if you need additional details please ask.
PREFACE: I am not a software developer, engineer, or electrician. I have only completed one other Arduino project back in June of 2021.
My hope is that this will help anyone interested in using the ESP32S3 and Nextion displays. This will not be a detailed overview of the project, but I do provide many photos and the code.
The objective of the project was to control several devices in my wife’s rabbit shed and chicken coop from within the structures and/or from the house.
- Devices used in both structures are: ceiling lights, cooling fans, water bowl heaters, heat lamps, external vent fans, and power outlets
- The unit provides AC power to outlets that provide the power for the devices listed above
- Intent is to control the operation of fans, heat lamps, and water bowl heaters using temperature sensors and set points in the code
- Provide basic ON/OFF operation for ceiling lights, power outlets, and external vent fans
- Operation of the Fans, heat lamps, and water bowl heaters is configurable:
- Default is AUTO - operates according to the temperature readings and set points
- Always ON
- Always OFF
- Each set point value can be changes and saved
- Set point values and device status (ON/OFF/AUTO) is saved in ESP32 local memory
- When returning from a power loss the system will return to the last configuration saved in memory
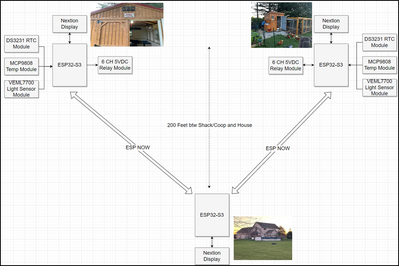
- Communications using ESP NOW between the rabbit shed/chicken coop and a unit located in the house (see diagram)
- Allows for device or set point changes without having to walk to the back of the yard (fine in spring, summer and fall. Miserable in winter)
System diagram:
Parts list for the rabbit shed and chicken coop:
- ESP32S3 Microcontroller
- Nextion Intelligent HIM display
- Adafruit MCP9808 Temperature Sensor
- DS3231 Real Time Clock Module
- 6 Channel Relay Module 5V Low Level Trigger Module4 Channel Logic Level Converter
- Waterproof Plastic Enclosure for Electrical Project
- 5V 3A Power Supply Adapter
The systems installed in the rabbit shed and chicken coop are physically identical. The differences are handled in the code and the HMI display.
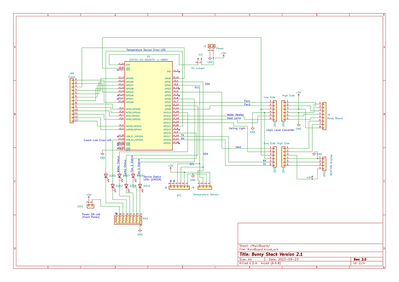
The schematic is below:
- Each unit is powered by a 5V 3A power supply adapter. This supplies the 5V for the Nextion display and relays. I also use the 5V to power the ESP32S3 through pin J1-21 (5V). I added jumper J12 to isolate the ESP32S3 when the microcontroller is connected to the PC.
- I added LEDs to display ON/OFF status for
- Two internal Fans (2 fans used in rabbit shed, in coop show status of fan and vent)
- Heat Lamp
- Water Bowl Heater
- Communications Error (between system and house)
- Temp Sensor Error
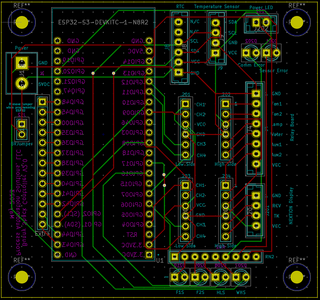
Here is a picture of the PCB that I designed and was manufactured by PCBWay.
J99 in the schematic is the line of pins (labeled “Extra”) to the left of the ESP32S3. These are unused microcontroller pins that I pulled out to a feedthrough in case I needed to hard wire a mod to the board.
Hardware Pictures:
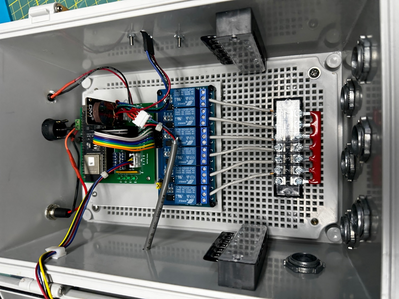
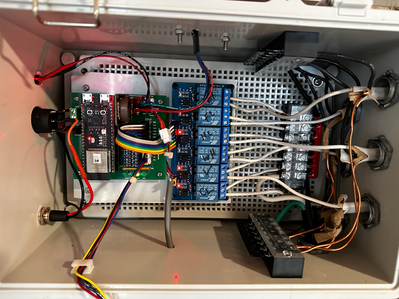
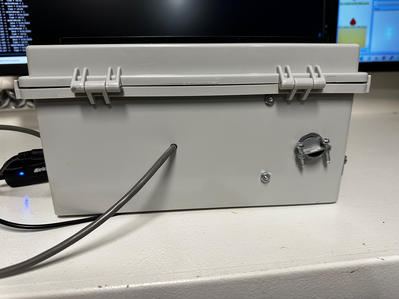
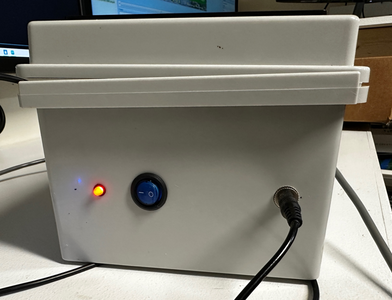
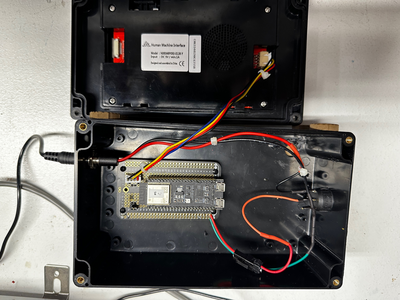
The unit for each location are identical. Here are a few pictured of the unit for the rabbit shed:
Before installation:
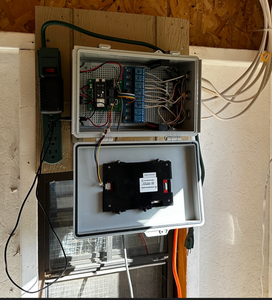
Unit installed:
This is a picture of the unit installed in the rabbit shed:
This is a picture of the unit installed in the chicken coop:
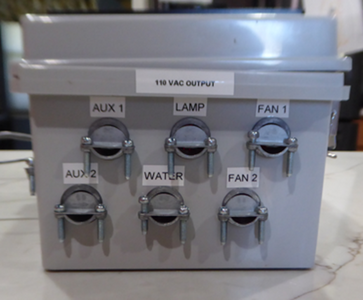
AC Output (labels were updated after picture was taken):
AC Input and temperature sensor cable:
5VDC input, Power switch and power LED:
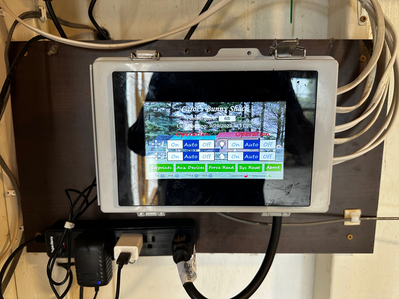
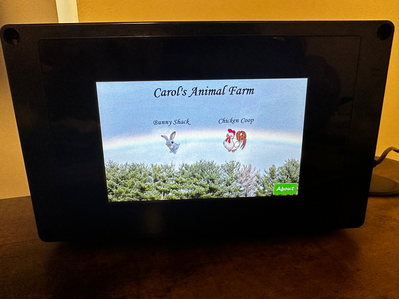
Here are a couple picturee of the unit in the house:
Nextion Display:
I used three Nextion displays for this project.
1 NEXTION NX8048P070-011C-Y 7” Intelligent display (rabbit shack)
2 NEXTION NX8048P050-011R-Y 5” Intelligent displays (chicken coop and house)
I used the Easy_Nextion_Library for the displays because it was the easiest for me (based on my limited experience). I did make one change in the EasyNextionLibrary.cpp file - I commented out the _serial->begin(baud) line (line 24 – see below) and initialized the object in my code. I was having trouble assigning the Nextion display to Serial2 when I also had to assign the serial pins. Getting the Nextion display to work with the ESP32S3 was the biggest issue I had in this project.
void EasyNex::begin(unsigned long baud){
  //_serial->begin(baud);  // We pass the initialization data to the objects (baud rate) default: 9600

  //delay(100);            // Wait for the Serial to initialize

  _tmr1 = millis();
  while(_serial->available() > 0){     // Read the Serial until it is empty. This is used to clear Serial buffer
    if((millis() - _tmr1) > 400UL){    // Reading... Waiting... But not forever......
      break;
    }
      _serial->read();                // Read and delete bytes
  }
}
Here are the Rabbit Shack Screens:
Main Screen:
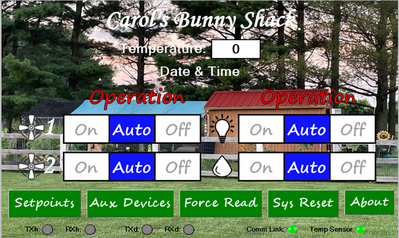
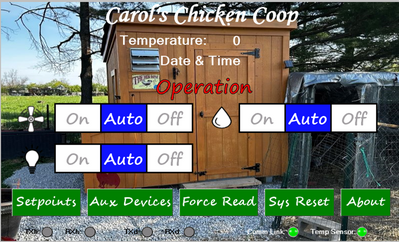
This is the Main Screen and displays the current temperature, date/time of last reading, and the four primary devices (fans, heat lamp, and heated water bowl).
BUTTONS:
Setpoints: moves to the set point page
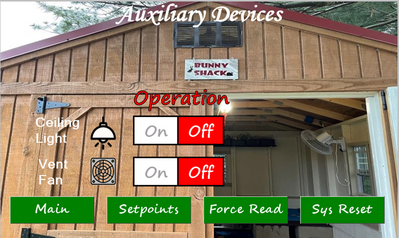
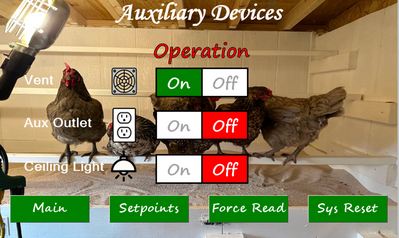
Aux Devices: move to the Auxiliary Devices page (vent & ceiling fan)
Force Read: Forces an immediate read (system is set for 1 min cycle). I have the displays set to enter sleep mode after 5 minutes and when they awake the screen isn’t current. You select Force Read to get an immediate update.
System Reset: You press this when you want to set the unit back to the original defaults contained in the code.
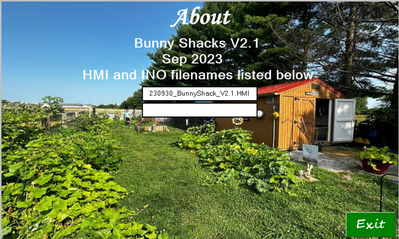
About: moves to the About page where I display the ino and HMI filenames
At the bottom of the page there are indicators for traffic and temp sensor/ESP NOW status. The TXh (transmit to house), RXh (receive from house), TXd (transmit to display), and RXd (receive from display) will blink green when there is data moving between the EST32S3 and the house or display. Easy way to make sure everything in communicating.
The Comm Link shows green if there messages are being sent to the house successfully. The link shows red if there is an error.
Temp Sensor shows green if the sensor is working properly and red if there is an error.
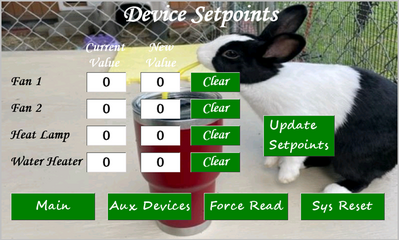
Setpoints Screen:
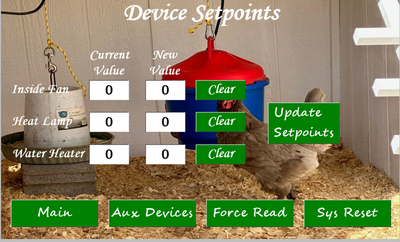
The current setpoint is displayed in the Current Value column. To change, you select the box under New Value and a pop-up numeric keypad (available in NEXTION editor) is displayed and you can enter a new value. To commit the changes you select the Update Setpoints button.
Auxiliary Devices Screen:
About screen:
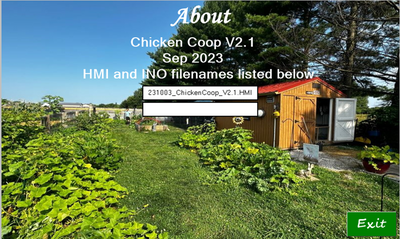
This screen is from the Nextion editor, so the ino field is blank. With the About screen I don’t have to guess when version of the software/display files I am using (as long as I remember to update the data in the ino and HMI files).
Chick Coop Screens: These screen are very similar to the rabbit shack.
The About screen is from the Nextion Editor so the ino field is blank.
House Screens:
The house uses all of the same screen that are used by the rabbit shed and chicken coop units expect the main screen below:
Code:
Each of the Arduino files are very large (approximately 1700 lines of code). I will paste them in a files so you can download. I would create a github page, but I have no idea how to create/update/use/manage one.
While you stated you're not an electrician..or a programmer, your project reminds me of the type of workmanship I have seen ( and done) in industrial process control applications.. very well done!
PS.. I bet the wife is happy too, that she doesn't have to trudge out to the bunny-chicken shacks in the winter...lol
regards,
LouisR
LouisR
Thank you. You're very kind.
And yes, she's very happy that she doesn't have to worry about the devices being on or going out at night to check.
@huckohio Very impressive.
First computer 1959. Retired from my own computer company 2004.
Hardware - Expert in 1401, and 360, fairly knowledge in PC plus numerous MPU's and MCU's
Major Languages - Machine language, 360 Macro Assembler, Intel Assembler, PL/I and PL1, Pascal, Basic, C plus numerous job control and scripting languages.
Sure you can learn to be a programmer, it will take the same amount of time for me to learn to be a Doctor.
Lesson Learned: Never place the control box within jumping/flying distance from the chicken's roosting bars. They will jump, roost on the box, and crap all over it! 😣
@huckohio Yep.. those darn chickens aren't grateful for any of your hard work now are they..lol
Maybe placing a wooden box around the control box with a door on it would help to at least keep the control box clean for maintenance checks or further expansion. Of course relocating the control box is also an option, but a lot more work..As you say, lesson learned!
Hope everything is going ok, winter is now upon us, although, where I'm located, we don't get much cold, and almost never any snow..We're on the Gulf coast, Mobile,Alabama. It's the rainy season right now, with temps in the upper 50's and lower 70's. Winter down here is Jan. & Feb. By middle of March, it'll be spring again..
Keep us posted on how the controls survive winter.
Regards,
LouisR
LouisR
I placed a couple boards to block access. All is well - didn't think they would jump/fly that far in the coop.
All is well in Ohio. No cold weather yet...didn't realize that Thanksgiving is next week.
Will keep you posted. So far the all devices are working well. This morning we had the Heat Lamps and Water Bowl Heaters running. By 1600 the fans were running to cool the shed down. Crazy weather.
Take care
Mike

