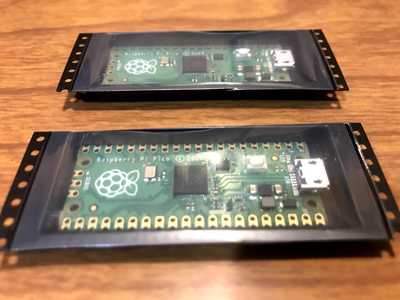
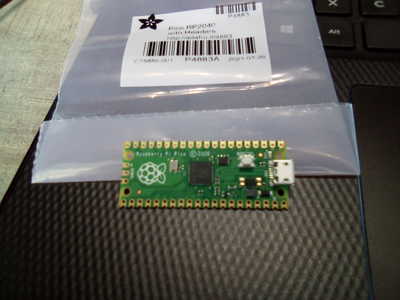
I’ve got my 5 Pi Picos mid-week. I spent most of the weekend working through the “Getting Started” book they provide in PDF form on their website. It is a pretty solid introduction into what can be done with the Pico and MicroPython.
First impressions, I amazed at how capable a device this little thing is. Here are a few things to be aware of if you are getting started.
1) It comes without pin headers attached, so be prepared to solder your own on. And at $4 per unit, it doesn’t ship with headers, so you’ll have to reach into your own parts bin for those.
2) It has support for both C/C++ and MicroPython development, but the Python toolchain appears more mature.
3) All the documentation has you using the Thony IDE out the gate, which has support for the Pi in its latest version. If you prefer VS Code or PyCharm, you will need to do some additional work to easily work with your Pico. I use VS Code as my IDE so here are a few tips that made my life better:
3a) Install the Pico-Go extension to keep your code in synch with the Pico. https://marketplace.visualstudio.com/items?itemName=ChrisWood.pico-go It works pretty well.
3b) If you want IntelliSense (code completion) support for the MicroPython classes in VS Code, you’ll need to install Micropy . It is a CLI that eases the integration with the IDE, enabling MicroPython IntelliSense and giving the Linter the metadata it needs to help you. You need to execute it in your project folder, and all is better after that.
3c) You may also want to install some other command line utilities like Minicomm and RShell which will allow you to connect to the Pico outside of an IDE environment.
4) The examples in the book aren’t bad. If you don’t have the exact components they use lying around, should be prepared to modify their examples somewhat. The good news is that it is easy to do. An example is I didn’t have the same Adafruit LCD screen they had, I just had a generic 2 line 16 character LCD with an I2C backpack. It didn’t take too much googling to find this library on GitHub which allowed me to talk to the model I had using MicroPython.
All and all, I had a great time experimenting with the Pico this weekend. I’m looking forward to incorporating it into projects in the future.
@larrytubbs Thanks! I have 2 on order, hopefully I'll add that to this week's vacation projects
"Hardware eventually fails. Software eventually works." - Michael Hartung
Picked them up yesterday, in a snowstorm. Not sure I'll get to it this week, but at least they are here.
I picked them up at an electronics store in Montreal (ABRA (hope I'm allowed to mention their name on the forum)). Interesting how they peeled them off a roll 🙂
"Hardware eventually fails. Software eventually works." - Michael Hartung
I received my two the other day. I haven't been this excited for new hardware in a long time. I'm looking forward to learning what I can about it. I'm also looking forward to improving my soldering skills when I attach the headers to use for breadboarding experiments.
--->Sean
(◕(' 人 ') ◕)
@sean451 "soldering skills" (or lack thereof) is why I bought 2 😓
"Hardware eventually fails. Software eventually works." - Michael Hartung
I've got a couple of projects waiting to help improve the "soldering skills." One kit is a simple timer with 60 LEDs that'll give lots of practice and the other is the DIY Oscilloscope kit. I got that one not only for the soldering practice, but also for learning the rudiments of using an o-scope. I put together a couple of other smaller kits and was quite happy with the results. I never knew soldering could be so much fun.
In other news, I was watching the first Iron Man movie the other day (as one does) and had to laugh at Mr. Stark puttering about his workbench and soldering together his infamous suit. It looked just like my own work except I have no plans on creating anything that will smash me against the ceiling.
Cheers!
--->Sean
(◕(' 人 ') ◕)
You guys are bringing back some old memories of folks 'learning' to solder!
It was 1980 and I was working in the second computer store in Atlanta, when a lot of computer components still came in kits. I had the 'pleasure' of repairing the MANY components that one particular customer returned to us after attempting to assemble the kit with the complaint the he couldn't get it to work.
What was generally found to be the major problem with his assembly skills was what earned him the title "He Who Solders With A Burning Stick!" The components literally looked like they had been soldered with a "Burning Stick!" 🤣
SteveG
What was generally found to be the major problem with his assembly skills was what earned him the title "He Who Solders With A Burning Stick!" The components literally looked like they had been soldered with a "Burning Stick!" 🤣
Well, I hope I don't earn that title! I made one mistake on my first solder attempt, too much solder that bridged two pads, but I was utterly delighted that the solder sucker that came with my kit worked like a charm. I was skeptical that it would work, but damned if it did as it should!
Cheers!
--->Sean
(◕(' 人 ') ◕)
I've been playing with my 2 Pico boards for a few days. One has CircuitPython from Adafruit on it and that works fine for most things including a lot of the Adafruit peripheral boards with the exception of the sdcard board. So I'm helping Adafruit debug that. The same problem exist on ESP32S2 so it's a library change in their Native vs. python Bus-Device library.
With the other Pico I'm running through all the examples in Micropython, C/C++, VS Code, debugger etc. I'm using a RPI4 as the development station so I can use the SWD debugger port.
Fun but whatever is being used in VS is not near as easy as PlatformIO. Debugging in VS on the Pico is so frustrating that I ran out of bourbon. I've set the Pico aside until I can get to the liquor store.
😀
If your code won't compile, have another glass of bourbon. Eventual the problem will be solved.
@jfabernathy, it is early days on the Pico platform that is for sure. Much maturing yet to do.
And I recommend a fine Single Malt from the Isle of Islay preferably.
I think I'll pick up a Pico in a while once the development platform has matured a bit. I see great potential, especially for people who are learning and are happy to work with Python. I don't know what the memory and CPU overhead is by using MicroPython (e.g. how much it is optimised compared to CPython?) but you can't go wrong with the massive Pi ecosystem of existing add-ons and sensors etc.
@jfabernathy, it is early days on the Pico platform that is for sure. Much maturing yet to do.
And I recommend a fine Single Malt from the Isle of Islay preferably.
I'm familiar with the products of the Isle of Islay. My ancestry from 400 years ago Scotland is too far removed from the "Peaty Scotch" taste bud gene. It's been bred out and replace with the Bourbon gene from Kentucky. 😀
If your code won't compile, have another glass of bourbon. Eventual the problem will be solved.
My Pico arrived today. What a nice little board. I knew from all the videos it was small, but when I got it, I was still surprised at how thin and light it is. I had already read the tutorials, and downloaded the .utf file. So I was prepared and ready for the letter carrier's delivery; but I have to say that within 10 minutes of opening the package, I had it running Python and executing code in REPL. 5 minutes later I used Thonny to Save As a main.py and it was blinking on its own. 10 minutes later, I had headers soldered on it. Now the most difficult question: What to do with such a handy little, $4, microcontroller running Python?
Scott
Imagine by thought, create, don't wait, Scott.
I plan on using one to make a mini-Tetris game using the pico display from Pimoroni as soon as it gets here. I'll let you know how it goes.
--->Sean
(◕(' 人 ') ◕)
UPDATE: I decided to rebuild my Raspberry PI 4 that I was using as a development system for my Raspberry Pi Pico. Now things are better. I did find out from the Raspberry Pi development team that if you use the Pico C/C++ SDK and VSCode it works and it will control the uploading of the code to the Pico if you have the SWD ports connected as documented in the SDK Guide. Single step, breakpoints, etc. all work. At this time trying to use the USB serial as a logging port is not advised since the USB is used for downloaded code and debugging by VSCode.
So my setup included the SWD ports and the UART on the Pico connected to RPI 4 pins on the 40 pin connector. That was the solution.
I also tested CIrcuitPython on the Pico. The advantages to CP on the Pico is I can use hundreds of drivers that CP has developed. As a test, I used the Adafruit_sdcard modules that allows reading and writing microSD cards. A few problems at first, but as of this morning I have a fix that works on the Pico. The Pico with it's extremely low power could be a great battery powered data logger by using the SDcard. I can't wait to get an Adafruit Pico (RP2040) Feather which has a LIpoly connector and charger, and a Stemma QT connector for all those sensor modules.
If your code won't compile, have another glass of bourbon. Eventual the problem will be solved.


