Step 1 of 102.228,25...
I already talked about this project in the 'Introduction' forum and want to continue it here while I'm busy with the second and improved version of the controller. (which will be available on my Hackster.io page when ready)
It's a long way to completion but I'm not in a hurry and I decided to dive deeper into C++ while 'underway'
For example: the Time and Timezone libraries were a mysterious black box for me so I dived deeper into that, spent a whole week on it but it's so rewarding to understand it much better now although the high level C++ often used is over my head...
What matters complicated way more was my decision to look for a Arduino Uno/Mega replacement. Wifi is available everywhere and to get accurate time to set the RTC alone it makes sense to 'upgrade'
I finally chose the Arduino Nano 33 Iot... Yes I know of the ESP controllers but 1. I want to support the Arduino community effort and 2. the upload speed in INCREDIBLE... I upload every x lines of code to see what is happening and when I would use and ESPxxxx I would be not happy to say the least...
But getting up and running with the SAMD platform and WifiNina chip was very challenging (for me). I spare you the details and it was well worth the effort.
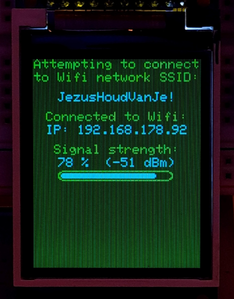
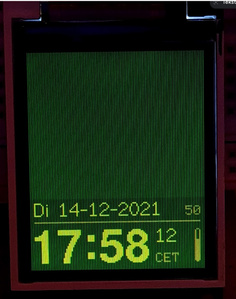
The 'simple' screen below on the left took me at least 40 hours of frustration and searching... Getting to grips with the amazing TFT_eSPI library from 'Bodmer' was a journey on it's own. Nothing to do with his library but for me programming and understanding new concepts is hard. I need a brain transplant to improve that... Donors please contact me!
But it's so much fun!! I want to encourage everyone who has troubles like me to press on because the reward is so great.
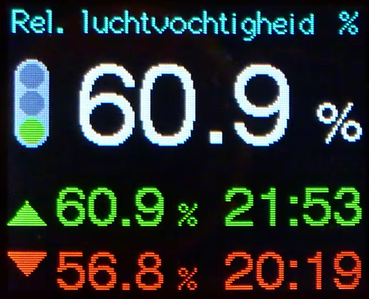
On the screen at the right side above:
Day, date and week number + leap year indicator (now not visible of course)
Time, summer time indicator and Wi-Fi strength.
Then I went on to play with what is called in the TFT_eSPI library 'Sprites' Wow! I love displays but I hate flickering displays... Can't stand them... There the Sprites come to the rescue.
The screen at the right side above, which is just a try-out version, has 3 sprite objects: the date section, the time and on the right side of the minutes a square which hold values which need update ever second. (except for the DST (summertime) text indicator of course)
So 'refreshing' the data on the screen such as seconds and the wifi indicator can be done very precise, leaving the 'static' areas alone. Each sprite is build up in memory and pushed to the screen when needed. Brilliant!
I have do dive deeper into (custom) fonts as there a many options in the TFT_eSPI library... Ideally I want to use nice looking fonts but with this screen that is not so easy due to the low resolution. (160x128)
I would for example like to use the fonts usid in my 'Gorgy Clock' project (same screen) but there I used a modified version of an Adafruit GFX font library which I don't know how to port to the TFT_eSPI setup. But it's possible to make custom fonts so we'll see...
To be continued...
Arduino Nano 33 IoT: actual upload is < 1 second... !
Write 88760 bytes to flash (1387 pages)

[=                             ] 4% (64/1387 pages)
[==                            ] 9% (128/1387 pages)
[====                          ] 13% (192/1387 pages)
[=====                         ] 18% (256/1387 pages)
[======                        ] 23% (320/1387 pages)
[========                      ] 27% (384/1387 pages)
[=========                     ] 32% (448/1387 pages)
[===========                   ] 36% (512/1387 pages)
[============                  ] 41% (576/1387 pages)
[=============                 ] 46% (640/1387 pages)
[===============               ] 50% (704/1387 pages)
[================              ] 55% (768/1387 pages)
[=================             ] 59% (832/1387 pages)
[===================           ] 64% (896/1387 pages)
[====================          ] 69% (960/1387 pages)
[======================        ] 73% (1024/1387 pages)
[=======================       ] 78% (1088/1387 pages)
[========================      ] 83% (1152/1387 pages)
[==========================    ] 87% (1216/1387 pages)
[===========================   ] 92% (1280/1387 pages)
[============================= ] 96% (1344/1387 pages)
[==============================] 100% (1387/1387 pages)
done in 0.471 seconds

Verify 88760 bytes of flash with checksum.
Verify successful
done in 0.071 seconds
CPU reset.
==================================== [SUCCESS] Took 4.31 seconds ====================================
An interesting project you have there, with quite a large chunk of code, and probably more to come.
Just a suggestion for you, I think you should now consider how best to refactor your code into multiple .cpp and .h files and perhaps consider using classes in you program structure.
I've just completed a refactoring exercise on one of my larger home control projects to control the central heating taking information from various sensors and from weather forecast data. I expect that, like me, you hack away at your program part time over quite an extended time period to get various things to work properly and along the way additional ideas crop up to be incorporated into the design. Before you know it you have a humungous bit of code.
Well I certainly ended up with an unwieldy chunk of a program and I've just completed a refactoring exercise and I've now got 18 program files instead of just two I started with. But, this has made it so very much easier to maintain and find relevant bits of code where I wish to make changes.
Anyway several program files or one large sketch, I will be looking at your project to get some good ideas about controlling my fans. 👍 I do like your very neat controller box, my 3d designs often leave much to be desired. I would embarrass myself if I showed you my 3d designed container to house my portable temperature sensors. I was trying to keep the sensor well away from the microprocessor board to avoid the processor heat from influencing the sensor In that I succeeded but it was not a pretty sight and SWIBO is not much impressed. Back to fusion 360 for me. 😀
Wow, thank you for your very interesting insight on how to improve the code! I totally agree and I will certainly look into refactoring code. I sometime came across such style of code and was a bit overwhelmed and didn't know how to get to grips with it but I now want to know more on how to do that. So thank you for making me aware to this possibility!
The box I used is great although you should never be embarrassed of the things you make yourself! I didn't start with 3D printing because designing 3D objects seems to be a mountain too steep to climb.
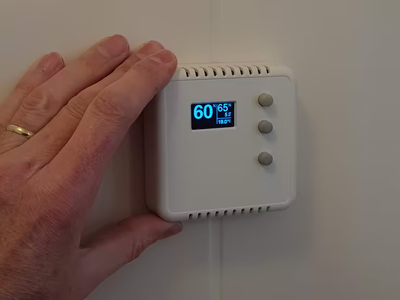
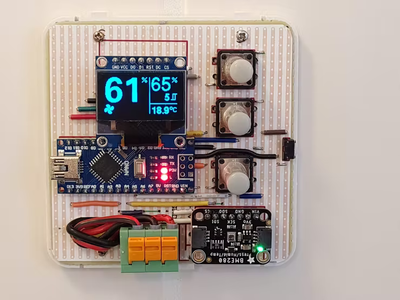
The box I used does perform very well, a bit to my surprise. The slightest change in temperature or humidity is picked up by the sensor. The new v.2 controller will have a proper PCB so I can put the controller board on the left-backside so that warmth (whatever there will be) can escape via the top slots and the sensor I will put on the lower right side, just above the slots there (as in the v.1 version)
As I said in the intro post, the v.1 controller performs way above expectation. It is so amazing to make your own things, that was unthinkable for me until I discovered the Arduino.
I hope I will be able to grasp the refactoring method...
If so you will see it when I completed the code...

