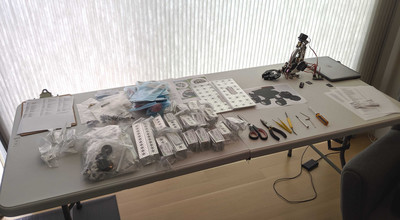
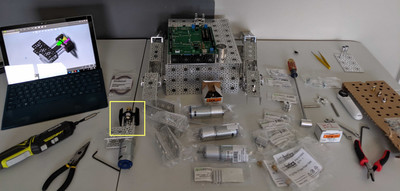
This is a fascinating Open Source robot project from NASA's Jet Propulsion Laboratories at Cal Tech (links below). I plan to spend some time looking at the details of this thing for "ideas". It is nice the degree to which the entire build process has been broken down into phases and fully documented.
I first saw it in the complimentary copy of MagPi magazine included with the Raspberry Pi 4 at: /home/pi/MagPi. Actually there is a lot of good stuff in the magazine.
Blimey, but that's a lot of Actobotics beams! 😉
Looks like it would be a lot of fun, though It would set you back a few dollars to build.
Blimey, but that's a lot of Actobotics beams!
Looks like it would be a lot of fun, though It would set you back a few dollars to build.
I thought the same thing. The BOM says $2500
Blimey, but that's a lot of Actobotics beams!
Looks like it would be a lot of fun, though It would set you back a few dollars to build.
I thought the same thing. The BOM says $2500
More in most people's price range? Good for a 3d printer project?
https://hackaday.io/project/158208-sawppy-the-rover
Something I would have loved to have built as a kid but I would have wanted it to be controlled by an "Earth control centre" (inside the house) sending commands and receiving images) perhaps with a delay (long way to Mars). Sending back data such as temperature, soil sample analysis, moisture measurements. Maybe have the solar cells to recharge the batteries.
With the internet or smart phone or satellite communications your robot could be in another country!! Maybe out there in the Simpson Desert!
The NASA rover looks pretty awesome, but I was concerned straight away that they were hanging a lot of weight on the front bearing of the drive motors. I have already decided to engineer my DB1-alike so that the weight of the robot is taken by bearings on the chassis rather than the motor bearings, and this thing weighs 2.5 times as much. I can't believe the 25mm dia motors they are using (i.e. smaller than the DB1 motors) will take this kind of weight.
That's the beauty of Bill's actobotics design. The motor is simply COUPLED to the axel, not part of it, so the axel and bearings take the brunt of the weight
Just had a look on the forum that supports the NASA rover build and it looks like rapid motor (or more correctly gearbox) failure is definitely an issue!
https://www.tapatalk.com/groups/jpl_opensource_rover/motor-troubles-t127.html
The design of the rover left me with a question about DB1. The NASA rover first brings the battery power to two voltage regulators (5 and 12 volt) and then distributes it to the other robot components. Chuckle, they also have a power switch. In DB1 we don't seem to have dedicated voltage regulators for two voltage lines and are using the regulators on the cytron drivers and the other boards. Maybe that is OK, but it seems like the voltage to all peripheral sensors needs to be regulated, which directly relates to the wiring of the terminal strips. At present it seems like we are distributing un-regulated voltages from the batteries.
Or do you think this will be addressed when the battery charging circuit is developped since that will sit fairly high up in the power distribution food chain? I guess time will tell...
Yes that is an interesting thread for sure. Someone should try swapping to the Servocity motors and see if that eliminates the problem. At least three or four teams struggling with this, however they are seeing the problems during calibration, not during normal operation, when loads are minimal. However Pololu agrees that the load from this design is high:
That load is definitely on the high side to be directly supported by the output shafts, especially given how far from the shaft bushing that load is being applied. For applications like this, we would generally recommend decoupling the weight of the chassis from the motors, and instead link the motors to the wheels with external belts or gear systems. My immediate suspicion is that the radial load is deflecting the shaft, causing alignment issues between the output shaft gear and the gear it meshes with.
Good thing they have engineers looking at it. One of the designers said his model has been working for two years without any motor issues although he did swap to Servocity motors for other reasons...
I had assumed that we would eventually be seeing NASA-type power regulation on DB1 based on a comment Bill made in one of the early videos, but I may have that wrong. I was also wondering if DB1 would have two batteries rather than sharing a single battery for both drive and logic circuits, so will be interested to see what Bill comes up with.
Although it sounds like the Servocity motor/gearbox units may not suffer the catestrophic early failures that the Pololu motors have, I still think this aspect of the design is poor (assumng I understand it correctly). The motors shown in your pics of the Boulder Team parts do look beefier than the Pololu motors.
I agree that the rocker suspension is really sweet!
Although the project is quite expensive to build if following the BoMs supplied, I reckon that you could cut the cost significantly by using standard aluminium sections in lieu of the Actobotics channel and by making some judicious ebay purchases for motors, etc. You would need a reasonably well-equipped workshop though.
you make good points. Looking at the 3D pdf files, and the build details, a lot of work has gone into this thing. I hope they get the kinks worked out quickly. I like the way they mounted the motor drivers on the bottom of the main PCB.
I think it will be easy enough to add the voltage regulators on the pcb for battery charging with a DPDT switch to route the battery power either to regulators and then terminal strips, or over to the charger circuit. Maybe a three-pole with center pole OFF. 🙂
OK guys, you've got to stop feeding my ADD! Now you have me off on this tangent with the rover!!
At least I had enough sense to steer clear of the JPL designed rover but now I'm just drooling over Sawppy. And a 3D printer to print all his printable parts. Have already gotten the STL files for Sawppy's parts, have installed Cura, and I am now ready to start "slicing."
And now you know what comes next... The 3D printer should be here tomorrow! Now have to learn about OctoPrint too. It's a good thing the walls around here are padded.
Willy Nilly is starting to feel neglected! ?
SteveG
Have already gotten the STL files for Sawppy's parts, have installed Cura, and I am now ready to start "slicing."
And now you know what comes next... The 3D printer should be here tomorrow! Now have to learn about OctoPrint too.
What kind of printer did you get ?
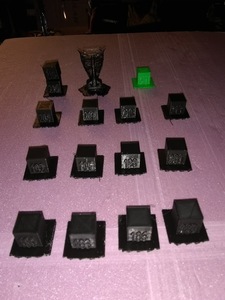
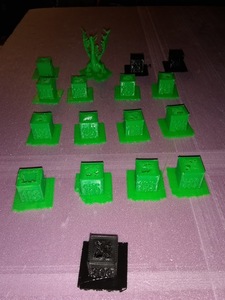
You need to do some test prints before you start printing real things. I made small hollow cubes with numbers on the sides that represent the temperature that I use to print them. You should do a set for each filament type that you use
This way you know what actually works best for your printer with each filament from each manufacturer cuz no matter what the "internet" says, or what the label on the filament says, each printer is unique in the way it actually performs
I can't remember which filament types I used for these test prints (they're old photos, I didn't bother printing new ones just for this post) but, as you can see, each one turned out differently. (and the green didn't turn out well at all, as you can tell from the holes in the tops)
The boxes are small and hollow, and don't really take that long to print, but, it's totally worth the effort to do the tests before you start a 24 (or more, which CAN happen) hour print job
And octoprint is easy (and WORTH IT), but, it'll give you a new hobby for a few days while you tweak it. All you need is a spare Pi that you can dedicate to it forever. (don't waste the money on a Pi4 for it, there's no need. I use a 3b and a 3b+, and they both work fine, although, the Pi4 MIGHT help if you decide to do timelapse)
The Anet A8 Plus. Have ordered some Drylin bearings to replace the originals as there was a post on Amazon, that even though most everything else on the A8 Plus had been upgraded over the A8, that the bearings were still terrible.
And I plan on doing quite a bit of test printing before jumping into anything like the Sawppy parts.
I've got a lot to learn before I can stop just treading water. No more interrupts!
SteveG


