Now you can simply call the function as follows, in place of all the if statements:
Thank you for you advise, I have made the changes you suggested.
Btw, what are the explicit meanings for both Dheading and heading?
Also, where do some of these magic numbers come from, such as "6" in: justoverheading <= 6?
Let me explain Dheading & heading as best I can
Dheading is my desired heading (direction) of the robot and that value changes throughout the
void chipmove() based on the encoder values, when a certain encoder value is reached the Dheading changes and the robot needs to turn . So the Dheading value changes.
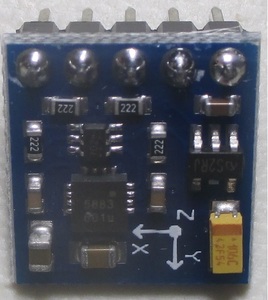
heading is a value the onboard electronic compass (LSM303) gives to the code and that is the direction the robot is currently going.
Also, where do some of these magic numbers come from, such as "6" in: justoverheading <= 6?
lol at magic numbers
well I warned you my logic might not make sense to anyone but me so let me try and explain my logic as best I can.
if the robot is less than 6 degrees over the desired heading it will only need a small correction(turn) to re-align to the compass heading and it will use the method of speeding up the right wheel for a short period of time to turn slightly back to the left.
on the other hand if the robot is more than 6 degrees over the desired heading it will need to re-align to the compass heading using a second method of turning by rotating the right wheel forward and the left wheel in reverse for a longer period of time ( justoverdelay ) . lets say the encoders reach a certain value and the Dheading calls for a 90 degree turn the robot will spin in place until it reaches the 90 degree turn. the justoverdelay will get it pretty close to the 90 degree turn and the robot will correct its heading next few times through the loop. GRRR at I cant turn off underline.
so the "magic number" 6 is going to determine which of the two methods it will use for turning.
method one : speed up one wheel
method two : spin in place
Hope I have explained this a little better, Thank you for all your input !!
here is my new ino code with the changes you suggested
Last week I purchased a duinotech 3 axis compass magnetometer module which I hope to test on my robot base which at the moment only uses encoder inputs for navigation. Is it something like the one you are using?
I haven't found any examples of using it yet.
I could probably help you with your code but first I would have to wire up an identical set up to test it.
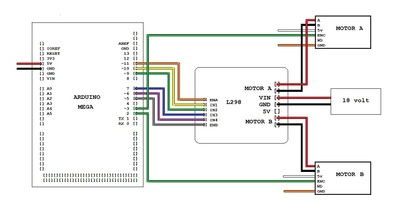
This is my current test base.
Is it something like the one you are using?
Yes its similar I think the code would be about the same.
At the present time I am only using the magnetometer , it has an accelerometer also.
Here is a link that may help some with yours.
https://forum.arduino.cc/index.php?topic=404316.0
Thank you for your interest, keep me advised of your progress.
This is my current test base.
Btw, How did you make that base diagram ?
This appears to be the same as the one you are using so I will have to get one.
https://www.altronics.com.au/p/z6391a-3-axis-compass-accelerometer-for-arduino/
So many configurations of the same circuits coming with no instructions and just maybe some very brief specifications!!
My problem is I live far from the city in the Australian countryside and don't buy anything over the internet so when it comes to getting parts I am limited to when I can make the long drive to the city and to whatever is being sold by Altronics or Jaycar.
The base diagram was drawn using the Paint program that comes with windows.
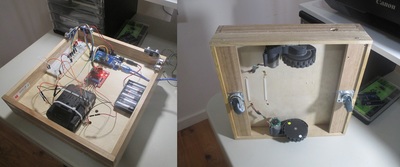
This is the actual basic hardware to which I will add all my sensors.
Right click image and choose open link in new window to get a more detailed view.
This appears to be the same as the one you are using so I will have to get one.
https://www.altronics.com.au/p/z6391a-3-axis-compass-accelerometer-for-arduino/
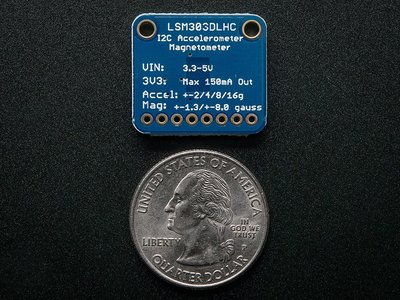
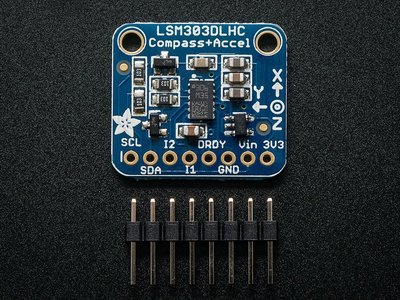
Yes that on seems to be a pretty close match to the one I have , mine is from Adafruit . Casey don't go buy one just to help me. I am pretty sure just about all these mag devices pretty much will work with very similar code so when you get yours up and running post the code and I will take a look at it. The reason I chose Adafruit is they had a library for arduino and some example code.
I am learning to code little by little as my spare time allows. There are a lot of very smart people here and some have been very helpful including you, and I do appreciate everything ( even criticism) as long as they honestly trying to help.
This is the actual basic hardware to which I will add all my sensors.
Right click image and choose open link in new window to get a more detailed view.
It looks very nice, are those motors and wheels from a roomba ?
Yes the motors are from a Roomba I got at a garage sale. The batteries had leaked.
I would suggest you analyse this piece of code you found and just extract the good ideas from it to enhance your code.
I think your idea of managing :
- a "rough turn" in place, only for large current changes
- and a "smooth turn" while advancing the robot, for small heading adjustments
is good !
Checking your chip2_11_17_2019.ino and the other code above, I have several suggestions :
- move all the RPMs calculation into a separate function, that you can call from your loop()
- beware that with the new void updateRPM() you will mandatorily apply the same speed adjustment to both motors so if they are not rotating at the exact same speed that will probably be an issue. I suggest going back to independant L/R adjustments, but still keep that code in this new separate function instead of directly in the loop() as it was originally.
- use PI (or M_PI from math.h, which your code already indirectly includes, since you use atan2) instead of redefining your very own Pi ?
- avoid declaring unneeded global variables : when they are used only in one function, and if you don't need to initialize them outside of that function, just declare them locally in that function. Example : the "justshy..." and "justover..." variables
- in int compassheading(int x, int y) the arguments x and y seem to be useless, so you can get rid of them, as well as of the mi/mj variables that you pass when calling this function and never use anywhere
- in void aligntocompass() things like "justshyofheading = justshyofheading - justshyofheading; // set it ot zero" are a bit shocking ? ? ! Why not simply "justshyofheading = 0;" ???
- check if the 0/360 degrees limits are properly managed in void aligntocompass() when comparing desired and current headings : i think that currently if you are headed to a 1deg "actual" and want to head to a 359deg "desired", your robot goes through a big 358deg turn tot he right instead of a small 2deg adjustment to the left ?
Dheading = 359;
heading = 1;
justshyofheading = (Dheading - heading); // justshyofheading = 358
justoverheading = (heading - Dheading ); // justoverheading = -358
if (justshyofheading < 10) { //false
  if (justshyofheading < 0) {//not executed
    justshyofheading = justshyofheading - justshyofheading; //not executed
  }
}
if (justoverheading < 10) { //true
  if (justoverheading < 0) { //true
    justoverheading = justoverheading - justoverheading; // justoverheading = 0
  }
}
- You always have the initial justshyofheading and justoverheading exactly opposites, and you get rid of one of them by putting it to 0, so that is where you could try to re-structure your code to use a "delta+direction" approach like the code you found on Github. For example something like :
#define TURN_THRESHOLD    6 //"hard turn" over 6 degrees heading delta
...
void alignToCompass()
{
  int headingDelta = (Dheading - heading); // headingDelta = 358 for Dheading = 359 and heading = 1
  if (headingDelta == 0) {
    return;
  }
  if (headingDelta > 180) { //true
    headingDelta = headingDelta - 360; // headingDelta = -2
  }
  if (headingDelta < -180) { //false
    headingDelta = headingDelta + 360; //not executed
  }

  bool bTurnRight = (headingDelta > 0); // false = turn left
  headingDelta = abs(headingDelta); // headingDelta = -2
  if (headingDelta) {// "hard turn"
  }
  else {// "soft turn"
  }
...
}
Generally, try to make one small change and test the results.
When you're satisfied : next small change+test
etc...
Eric
Checking your chip2_11_17_2019.ino and the other code above, I have several suggestions :
- move all the RPMs calculation into a separate function, that you can call from your loop()
- beware that with the new void updateRPM() you will mandatorily apply the same speed adjustment to both motors so if they are not rotating at the exact same speed that will probably be an issue. I suggest going back to independant L/R adjustments, but still keep that code in this new separate function instead of directly in the loop() as it was originally.
- use PI (or M_PI from math.h, which your code already indirectly includes, since you use atan2) instead of redefining your very own Pi

- avoid declaring unneeded global variables : when they are used only in one function, and if you don't need to initialize them outside of that function, just declare them locally in that function. Example : the "justshy..." and "justover..." variables
- in int compassheading(int x, int y) the arguments x and y seem to be useless, so you can get rid of them, as well as of the mi/mj variables that you pass when calling this function and never use anywhere
Thank you so very much for ALL your help, I have made all the changes(above) you suggested in the code and plan on implementing the new aligntocompass() you suggested although there is one thing I cant figure how to do there, and that is how to replace my justshyofdelay and justoverdelay that I use to keep the motors on until the turn is complete.
Here is my new ino file if you want to look it over.

