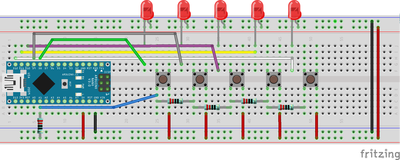
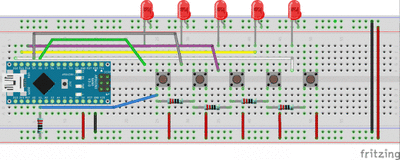
What software do most people use to create Arduino .png diagrams? I don't mean detailed, "professional" schematics, but ones that show the components, breadboard and wiring such as most of the ones on:
https://create.arduino.cc/projecthub/
An example of the complexity I'm looking for is the Sezme Breadboard Schematic at the bottom of this page:
The Internet mentions Fritzing and Eagle, with dozens of comments saying Fritzing is too limited and simple for anything other than beginners, and Eagle is too complicated with a very steep learning curve. There have to be other options, but I can't find them. Most of Bill's sites associated with his YouTube channel seem to use something similar to what I'm seeking.
I want to do this on Mac OS X, but I can use Linux if that's where the best packages exist. Windows would be my last choice. I would appreciate some tips. I don't mind paying a little if it's not too expensive, but I don't want to buy a golden sledgehammer to kill a flea.
Paul VE1DX
Fritzing!
Look HERE
Oops! Guess I didn't read all of your message! ?
But I still think that's your best bet after reading the entire post and seeing what you are trying to accomplish.
I would stay away from Eagle but consider KiCad if you want to make serious schematics.
SteveG
I would stay away from Eagle but consider KiCad if you want to make serious schematics
I can't speak to Eagle, but I'm currently working in KiCad as we speak and it is absolutely fantastic!
I've been working in the schematic and PCB parts libraries creating my own parts. And it's just beautiful the way you can coordinate your schematic symbols with the PCB footprints. I'm also using the multi-part function of the schematic symbols which is really a nice feature. For example I just made a single part that has 8 different schematic symbols associated with it. Part A through H. It's really nice.
DroneBot Workshop Robotics Engineer
James
/*
Four 220-ohm resistors are connected in series. They can selectively have 5 V applied to each junction point, creating a multiple voltage divider. We read the end in the chain, which will have a voltage between 0 and 5 volts. The Arduino Nano board contains an 8 channel, 10-bit analog to digital converter.
This means that it will map input voltages between 0 and 5 volts into integer values between 0 and 1023.
This yields a resolution between readings of 5 volts / 1024 units or 0.0049 volts (4.9 mV) per unit.
27 January 2020
Paul M Dunphy
*/
int led1 = 12;
int led2 = 11;
int led3 = 10;
int led4 = 9;
int led5 = 8;
int analogPin = 1;
int analogValue = 0;
// A/D integer value to trigger each LED
int led1Low = 190, led1High = 215;
int led2Low = 225, led2High = 275;
int led3Low = 300, led3High = 350;
int led4Low = 400, led4High = 550;
int led5Low = 850, led5High = 1023;
void setup()
{
pinMode(led1,OUTPUT); digitalWrite(led1,HIGH); // Pin HIGH turns LED off
pinMode(led2,OUTPUT); digitalWrite(led2,HIGH);
pinMode(led3,OUTPUT); digitalWrite(led3,HIGH);
pinMode(led4,OUTPUT); digitalWrite(led4,HIGH);
pinMode(led5,OUTPUT); digitalWrite(led5,HIGH);
}
void loop()
//
// Loop through and if any of the buttons are pressed, activate the corresponding LED for 1 millisecond. This stops
// the LED from being on all the time (the circuit doesn't use dropping resistors to limit their current.) By keeping
// the duty cycle to approximately 50% (at ~4.6 KHz), we effectly cut the power going to the LED in half. It's still
// quite bright, but is able to dissipate the heat seeing as it's only on half of the time. The 4.6 KHz frequency is
// achieced because that's how fast the Arduino Nano can run the loop. Changing the delay value will alter the duty
// cycle and frequency (and thus the LED brightness and power load.)
//
{
analogValue = analogRead(analogPin);
if(analogValue >led1Low && analogValue <led1High) // Nominal A/D integer value as of 26 Jan 2020 = 202
{
digitalWrite(led1,LOW);
delayMicroseconds(100);
digitalWrite(led1,HIGH);
}
else if(analogValue >led2Low && analogValue <led2High) // Nominal A/D integer value as of 26 Jan 2020 = 242
{
digitalWrite(led2,LOW);
delayMicroseconds(100);
digitalWrite(led2,HIGH);
}
else if(analogValue >led3Low && analogValue <led3High) // Nominal A/D integer value as of 26 Jan 2020 = 324
{
digitalWrite(led3,LOW);
delayMicroseconds(100);
digitalWrite(led3,HIGH);
}
else if(analogValue >led4Low && analogValue <led4High) // Nominal A/D integer value as of 26 Jan 2020 = 455
{
digitalWrite(led4,LOW);
delayMicroseconds(100);
digitalWrite(led4,HIGH);
}
else if(analogValue >led5Low && analogValue <led5High) // Nominal A/D integer value as of 26 Jan 2020 = 980
{
digitalWrite(led5,LOW);
delayMicroseconds(100);
digitalWrite(led5,HIGH);
}
}
It looks like Fritzing is the level of complexity I want.
You can also modify them in another graphics program if you want. Like even animate them.
Although I think to see the animation you may need to click on the picture and view it in the viewer.
It doesn't appear to be animated in the preview.
DroneBot Workshop Robotics Engineer
James
Cool! I didn't know you could do that! Is that how Bill adds components to his slides?
SteveG
@ve1dx Fritzing is a paid software, I guess. Did you purchase the software?
I suggest, you log on to www.tinkercad.com
Create an account there and start creating Arduino circuits and simulations. It's absolutely free.
Fritzing is a paid software, I guess. Did you purchase the software?
Fritzing is not paid software, it is a free open-source program.
😎
Bill
"Never trust a computer you can’t throw out a window." — Steve Wozniak
Fritzing is a paid software, I guess. Did you purchase the software?
Fritzing is not paid software, it is a free open-source program.
😎
Bill
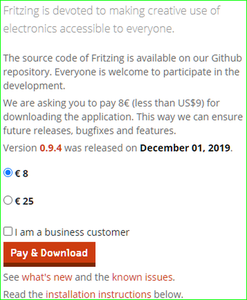
The download link takes you to the following:
Unless there is a hidden link somewhere else, it appears to require payment?
Guess I won't be using Fritzing going forward, to many free tools that fill the bill for me!
SteveG
I stand corrected, Fritzing WAS free when I last used it but now there is indeed a charge (albeit a very small one).
Okay.... Then I might be wrong.

No, you are right, I was wrong. I honestly haven't looked at Fritzing for years as I personally don't have a use for it, so I was speaking from outdated experience.
Sorry about that!
Bill
"Never trust a computer you can’t throw out a window." — Steve Wozniak
Of course, you still can get it for free if you want to save the nine bucks, just build it yourself!
I think the nine dollars is worth not having to do this, but if you are on a budget or if you just want to learn how to compile code it may be worth the effort.
😎
Bill
"Never trust a computer you can’t throw out a window." — Steve Wozniak


