No idea where your image came from.
All I know is the VL53L5CX sensor provides up to 8x8 resolution of distance measures.
To make a larger map maybe move the sensor and stitch the results together but there is nothing on the internet I can find showing any of this. I don't have the sensor to play with myself.
This is a depth map lidar camera.
https://www.intelrealsense.com/lidar-camera-l515/
@robotbuilder That image is showing you where the example sketch is in the Arduino IDE. You probably already have it, I was just not sure so chimed in. Sorry if I confused you.
First computer 1959. Retired from my own computer company 2004.
Hardware - Expert in 1401, and 360, fairly knowledge in PC plus numerous MPU's and MCU's
Major Languages - Machine language, 360 Macro Assembler, Intel Assembler, PL/I and PL1, Pascal, Basic, C plus numerous job control and scripting languages.
Sure you can learn to be a programmer, it will take the same amount of time for me to learn to be a Doctor.
- All sensors are installed and working.
- Gyroscope
- Accelerometer
- Magnetometer
- Barometer
- Temperature
- ToF
- Wired up the voltage to get the "Fuel Gauge" to work and give a realistic indicator.
- Separated the micro-stepping wiring to a left/right so the speeds of the two motors "switching gears" can be made automatic... meaning one may be in low gear while the other is in high-gear while making a turn.
- The servo pivots the head.
- Skids to hold it up while I focus on ToF sensor instead of balancing
- Uses InqPortal Admin to change parameters
- Has custom page for control (same as one in Inqling Sr.)
- Has custom page for ToF output.
- I didn't include a BMS so I can not charge the batteries while in Inqling Jr and need to swap them occasionally.
- Senior used a battery shield that had automatic over-discharge protection. I must use the gauge to make sure I don't over-discharge manually.
- Several Ergonomic design flaws in the 3D Print
- The stepper motors, A4988 drivers and the batteries to a lesser degree are creating a lot more heat than I was expecting. Although I did put some air venting in the model, I feel it needs a lot more. I doubt a PLA print would be able to handle it... it'd likely end up a pool of parts.
- It is a royal PITA to have to dissemble it to replace batteries especially since the batteries are below the electronics. Fortunately, I used connectors.
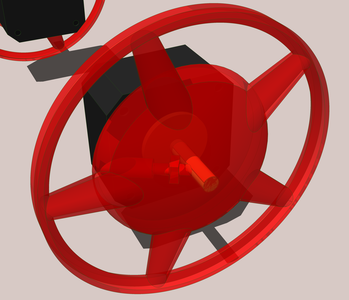
- I have no screws to tighten the wheels to the shafts and have had one high speed crash due to losing a wheel.
- Have a fantastic "crash helmet" for the exposed ToF sensor, but apparently the reflections are interfering. All distances are a couple of centimeters. I am outside the data-sheet's specified FOV zone. I'll try painting it a flat-black on the inside, but I'm not holding out much hope.
- Gyro running at 190 Hz - This is CPU costly as it does the Trigonometry for calculating the tilt angle.
- Accelerometer running at 50 Hz
- Magnetometer running at 6.25 Hz
- ToF running at 15 Hz
- PWM is done by bit-banging on the ESP8266; therefore the Servo is constantly taking a time slice to bang away even when the servo is not moving.
- Although the A4988 drivers handle most of the heavy work, they are still stepped by bit-banging.
- Web Server - Although the page requests don't take up much CPU time, the Web Sockets, pumping data out to the GUI are blowing about 50 kB/sec taking CPU time to handle all the low level WiFi / TCP
- 0:00 - Opening, shows my desktop with the editor with the source for the server and client in Notepad++. Left of it, is the Arduino IDE just being used as the compiler. Above it, is the InqPortal Admin on the Settings Tab. The orange field indicates the last valid connection as Inqling Jr is currently turned off in the center window.
- 0:37 - Powering on. ToF sensor requires some configuration that takes about 3 seconds. After that, it connects to my home router and Chrome takes its own sweet time noticing its back up and re-connects. No human intervention is required after hitting the power button.
- 0:49 - Chrome reconnects and connection shows green on the Admin. Note the Loop Frequency is over 90 kHz. This is an InqPortal feature to give a performance metric of how loaded the ESP8266 is. Analogous to Performance in Window's Task Manager.
- 1:07 - Switching over to the InqPortal Admin App tab which shows all published variables of the Sketch. In this case, showing all the values of the sensors. Video is only recording at 30 Hz, but some values are a blur running at nearly 200 Hz.
- 1:18 - Back to the File Manager tab of InqPortal Admin showing client files that are delivered to browser on request. The context menu is used to browse to the R/C control window for Inqling Jr.
- 1:40 - Tooling around with Inqling Jr. Although the 30 Hz video rate makes it look choppy, the action is quite fluid at this point. In the source code, you may note both the Servo and ToF sensor are commented out with the first two lines of code.
- 2:25 - I uncomment the Servo and ToF code, recompile the program using the Arduino IDE.
- 3:40 - Using InqPortal Admin's drag and drop feature to do the over the air (OTA) of the Sketch binary.
- 4:00 - OTA is complete and the system reboots, reconnects to my WiFi router. Chrome finally notices and reconnects all the GUI windows. Kind of small, but you will also notice the head rotates to tell me what stage of the boot up process is running. Remember the ToF sensor requires an upload of its ROM code that takes several seconds.
- 4:15 - Note the loop frequency is down considerably to about 35 kHz. The CPU is being overloaded and many aspects are impacted. Although its hard to tell since the video is choppy already, Inqling Jr's movement is quite stuttering.
- 5:00 - Back to InqPortal Admin's File Manager tab and we browse to the client showing the ToF data. At the end, Inqling Jr. is backing up and you'll note the distances are increasing as evident of shifting from red, orange, yellow, lime, green, teal, blue, navy, purple, black for the furthest distances.
3 lines of code = InqPortal = Complete IoT, App, Web Server w/ GUI Admin Client, WiFi Manager, Drag & Drop File Manager, OTA, Performance Metrics, Web Socket Comms, Easy App API, All running on ESP8266...
Even usable on ESP-01S - Quickest Start Guide
Getting there. You need to be able to read those numbers into a program to clean them up and address them with the position of the robot and the direction it is pointing. A nice touch would be a camera image of the same view as the distance readings.
3 lines of code = InqPortal = Complete IoT, App, Web Server w/ GUI Admin Client, WiFi Manager, Drag & Drop File Manager, OTA, Performance Metrics, Web Socket Comms, Easy App API, All running on ESP8266...
Even usable on ESP-01S - Quickest Start Guide
Besides the Magnetometer, I'm not sure what else I can use to orient and give a position of the robot. Any suggestions for setting a datum? I would orientate to recognizable features, but if the magnetometer works...
Not sure what you mean by "setting a datum". I am talking about using the numbers to map the room as the robot moves about. From what I can see from the video the numbers look good.
... are you suggesting I just put a phone camera on a tripod to get a so-so orientation?
Never thought of that 🙂 You can of course see what it is looking at because you are there. I was thinking in terms of understanding what the numbers were of. In the video link I posted you could see what the sensor was looking at as well as the 8x8 distance colors.
Don't get me started on the economic politics of today and our foolish reliance of imports instead of being self sufficient even though that might be more costly in the short term!
As for computing power I have the laptop to play with until a RPi become affordable or even available.
Mate... our $dollar is currently sitting at ~67 cents USD ... we have been slammed for far too long, and it's time we all revolt from out pathetic globalist NON LEADERS - throw the #$%^& out!
FYI:
Forgot to mention, have you looked into the "Orange Pi4" ?
It's quite a good replacement, and potentially even better.
Cheers
FYI:
Forgot to mention, have you looked into the "Orange Pi4" ?
It's quite a good replacement, and potentially even better.
Actually, I bought and played with an RPi two years ago so I can get that up and running until I decide if to update to a faster RPi. Yesterday I bought a 7 inch 1024x600 touch screen to replace the oversized monitor I was using.
Cool, but there are many new devices since that time which may be at least as good, but cheaper!
Thanks, and Cheers
UPDATE
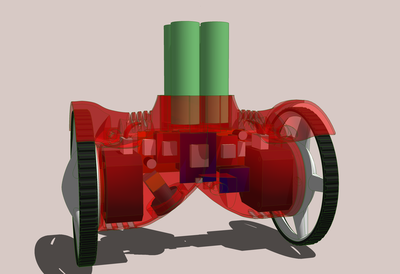
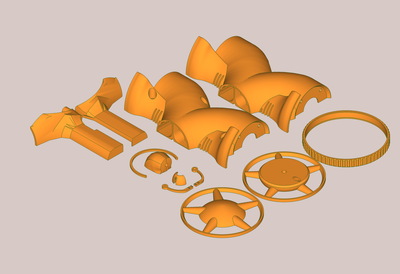
As I mentioned above, I wanted to address a few issues with the chassis. Besides... Inqling Jr was becoming self-conscious about its body and sought help from a famous Hollywood plastic surgeon. So... out from under the knife we're still in recovery and not back to fighting form...
As mentioned, the ESP8266 was becoming way overtaxed for real time operation and the time slicing was being noticed in the hesitation of the motion. This would become critical if/when we get to the balancing mode eventually desired. Surely if an 8 bit/16 MHz Arduino can balance a bot a 32 bit / 160 MHz can do it also.
I will be separating out the the motion control aspects: steppers, drivers, gyro, accelerometer and an ESP8266 to be house in the lower portion of the body.
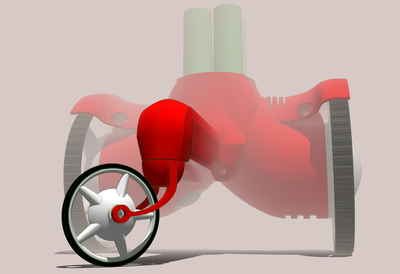
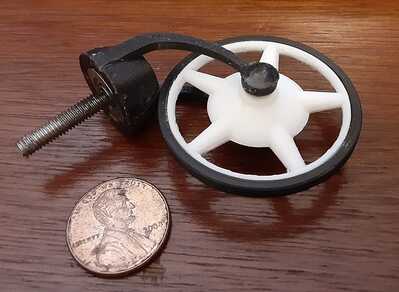
Inqling Jr. will also have an optional tail with a castoring tail wheel until it learns to balance at some later date. It is held on with a single bolt.
As this is posted, the lower unit is getting printed, trimmed and assembled.
TBD - A power socket will be fed to the top of the 4 x 18650 cells where a second housing will be pluggable and/or replaceable without having to affect changes in the lower unit. In fact the lower unit will be drivable as a remote control toy. The upper unit will contain all the equipment needed for whatever the future might hold for Inqling Jr. In the first cut, this should be another ESP8266, a stepper motor and driver for turning the head, a magnetometer and of course the VL53L5CX Time of Flight sensor.
VBR,
Inq
3 lines of code = InqPortal = Complete IoT, App, Web Server w/ GUI Admin Client, WiFi Manager, Drag & Drop File Manager, OTA, Performance Metrics, Web Socket Comms, Easy App API, All running on ESP8266...
Even usable on ESP-01S - Quickest Start Guide
Once you get all your hardware together it will be interesting how you go with the rest of it. I think the software will be a big task when you get back to mapping, vision and autonomous behaviors. With lidar data I think ROS and MatLab can be used but do they have it for the TOF sensor you have? iRobot experimented with ROS2
https://www.infoq.com/news/2019/11/ros2-linux-embedded-platform/
I thought you mentioned, you like writing your own from first principles. 😋 With my limited ability to surf the web, and knowing this is a huge subject... would you have some bookmarks that might emphasize just the ROS/MatLab aspects needed for 3D room mapping?
My current impression is that ROS is extremely generalized and I am concerned about bloat required to support so many different conceptual aspects: vision, motion, balance, etc. From your link... the fact that they're using a generalized communications layer (DDS) that if not tuned properly has every object talking to every other object... is a complete CF (almost literally). 🤣 If my goal is to eventually get this running on the robot (one way or another) ROS makes that an almost certain non-starter.
Maybe if you have some good links, I might find value in using ROS during a prototype phase if it can get something moving fairly easily. But, being retired, I'm not really on a schedule and... if ROS got the whole problem done in a week, I'd have nothing to do over next winter. 🤣
3 lines of code = InqPortal = Complete IoT, App, Web Server w/ GUI Admin Client, WiFi Manager, Drag & Drop File Manager, OTA, Performance Metrics, Web Socket Comms, Easy App API, All running on ESP8266...
Even usable on ESP-01S - Quickest Start Guide
I thought you mentioned, you like writing your own from first principles.
Back when I was most interested in robotics and programming there was no choice but to write from first principles and it is at that level I understand what is required even if I haven't always been able to achieve much due to time, money and brain limits. Now it is still of some interest when other things are not pressing me for my time but mostly I imagine what I can do without actually doing it.
The reason I mention ROS is because your project seems complicated. Although I looked at a few ROS tutorials I saw no value in it for me.
I really got caught up in this thread because of the title 🙂
I joined the forum when Bill was going to build a "real" robot but it kind of went no where and I mainly took an interest in other people's projects. There was no interest in "first principles" when it came to building robots so I was working alone.
There are working examples of how to get your robot to balance on two wheels but not any on using the VL53L5CX Time of Flight sensor for mapping. They claim it can be used for mapping but I find no real examples of it being used for that and have no real idea how it can be done or if it can be done without lots of computing power. The VL53L5CX seems to be a very low res TOF camera. I noticed with the high res TOF camera you end up with a depth color coded image which is very nice to look at but it still comes back to what you do with the data and that comes back to image analysis algorithms.
https://medium.com/decodein/the-time-of-flight-camera-is-shaping-the-future-f47806aba135
I really got caught up in this thread because of the title
If you want, I'll P.M. you when I actually quit dorking around with trivial stuff like chassis, electronics, wiring and that boring stuff like making it move that anyone can do. 😉
3 lines of code = InqPortal = Complete IoT, App, Web Server w/ GUI Admin Client, WiFi Manager, Drag & Drop File Manager, OTA, Performance Metrics, Web Socket Comms, Easy App API, All running on ESP8266...
Even usable on ESP-01S - Quickest Start Guide
I don't think anything you have done so far is trivial, indeed it is complicated from my perspective, just not relevant to mapping, vision and autonomous behaviors or how you are going to make use of the TOF data 🙂

