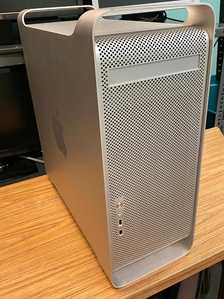
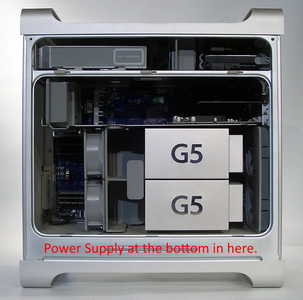
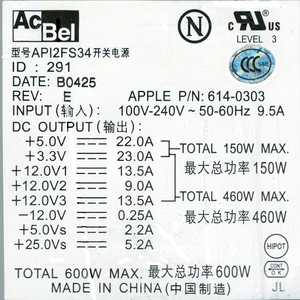
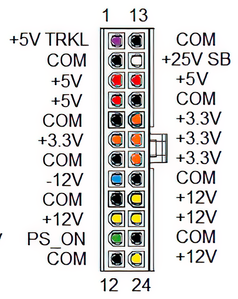
Huge credit to Bill's "Convert an ATX Computer Supply to a Bench Power Supply" project. That's what I was going to build. I removed my ATX from an old PC. Took the left over case to the dump and there it was... A 600 Watt Apple Mac Pro G5 with dual processors just sitting there. It's big and heavy and I had it in the back of my truck in 5 seconds. LOL.
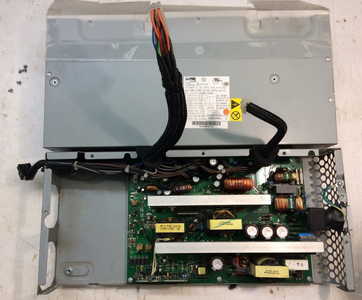
It was not easy getting the Power Supply out. I actually found a YouTube video how to do it. Had to improvise when I needed a foot long torx screwdriver.
It's pretty much the same output as an ATX except it has an extra 25 V output and the Amps are higher. Plus it is probably of higher quality than ATX clone power supplies.
The large size of the PS dictated a case larger than I would like but...
So the inside is 12" X 5.5" and 8" tall. A nice bonus was the 2 fans already running attached to the PS.
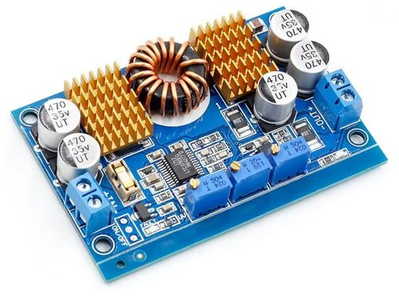
I added a Buck-Boost board because I wanted to add 9V and 19V to what this project offers by default. I fix laptops at times and 90% of them have 19V batteries at about 4A.
As you can see here it fills my new wooden box I built for it.
For the front panel I used a sheet of white guitar pickguard material that had a center layer of black in it. My CNC machine cut the lettering into the black layer which resulted in nice print.
There are 3 tiny holes accessing the Buck-Boost variable voltage boards pots that I adjust using a small plastic screw driver.
Well here she is... Complete!
The Buck-Boast Board only works on the 12V and 25V outputs and I'm ok with that. I can raise or lower the voltage of each with a max voltage of 30V.
Thanks for listening people. If you find one of these Mac Pro G5's. Grab it!
Thank You Bill for the idea, your video and inspiration!!!
Cheers and Stay Safe
Rick Hubka
@rhubka
Nice !
Thanks for sharing this.
Anything seems possible when you don't know what you're talking about.
@rhubka That's beautiful work you've done, I'm sure you'll get a lot of use out of it.
Your mention of the long Torx driver brings back memories. In the 90s a friend of mine asked if I could repair a very large (and very expensive) video monitor for him. In order to open it up, I needed a very long T15 Torx driver, so he purchased one for me. It was actually 1 meter (39 inches) long!
😎
Bill
"Never trust a computer you can’t throw out a window." — Steve Wozniak
Hi @rhubka,
I managed to pick-up one of these "cheese grater" G5s at the dump for $5 so am planning to convert the PSU as you did and eventually build a PC in the case. Are you by any chance able to provide the wiring schematic you used for your build - this would be really helpful when I do mine.
Many thanks,
mp
Sorry mp
I never made a wiring schematic. I used Bill's wiring schematic and just made changes on the fly. I tend to do that a lot and often regret it later.
Have Fun
Rick

