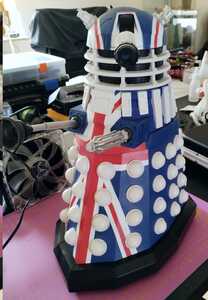
I had this Dalek model sitting on my shelf for almost ten years now - it's the Doctor Who 50th anniversary UK Dalek model:
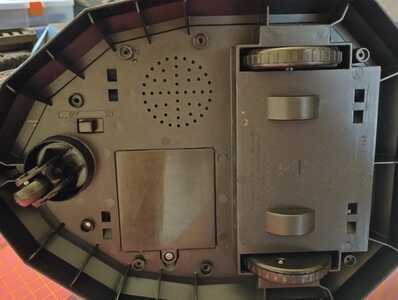
It has a blue LED in the eyestalk that shows if it's turned on, and two LEDs on the top. There's a button hidden in one of the bumps, which triggers a random sound being played with the top LEDs flashing. The wheels on the bottom are just for moving it by hand.
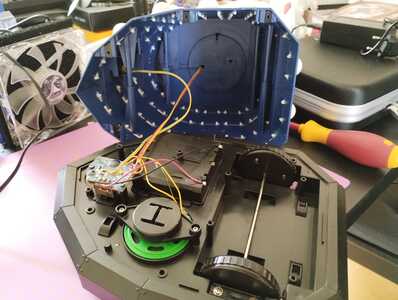
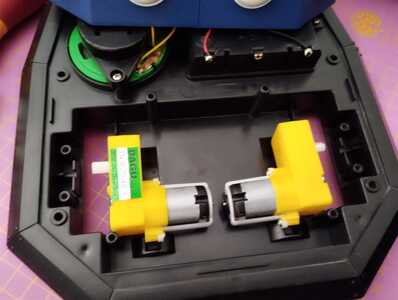
So, I thought I could turn it into a proper robot (yes, I know Daleks technically are no robots). Since I got an Arduino Mega 2560 for my birthday and haven't found a use yet, I'll try to use it for now, maybe replacing it later. There should be plenty space inside:
Planned steps so far:
- swap the wheels with motors, and controlling movement using the Arduino
- add sensors for collision detection
- control LEDs by the Arduino and maybe re-add the voice output
- add more sensors, maybe even a camera
- try to get the head turnable using stepper motor or servo
What I already have done:
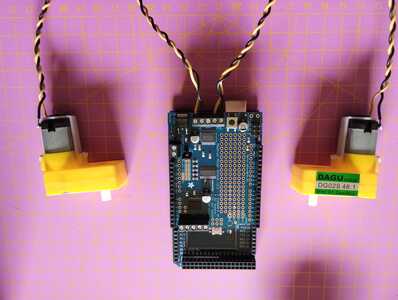
- add a motor driver, I chose the Adafruit motor shield v2.3
- buy two small enough motors to fit inside
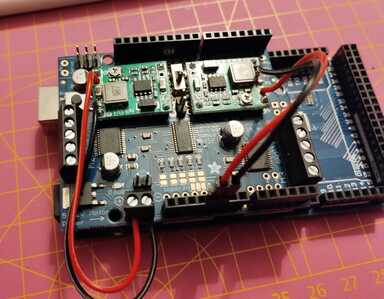
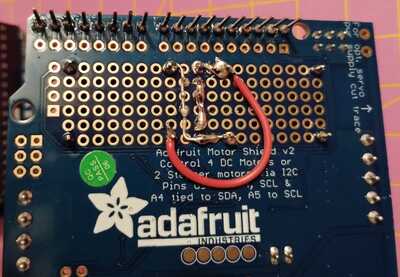
As for powering it, I want to use the 4 AA battery holder that already is present. But I want to use rechargable batteries. Since I have a couple of LiFePO4 batteries in AA size, I'll use those. this results in 12.8V, so I got a couple of buck converters to regulate it down to the 5V needed for the Arduino, and the 6V for the motors. These fit perfectly into the prototyping area on the motor shield, with enough space for a switch, which I soldered today:
Next thing I'll do is add a protection board for the batteries, but this already works so far.
Also, I'll need wheels - somehow it's hard to find any of correct size (55mm should be fine). And I need to find out how to hold the motors in place.
I'll update my progress here, feel free to post comments or suggestions.
Current projects:
- Modding my Gameboy Advance SP
- Turning Dalek into robot
Finished projects:
- Talking plant monitor (ESP8266)
- Mail box monitor (ESP8266-01S)
Other devices:
- Raspberry Pi 4B 4GB running Home Assistant
Yes indeed, a camera and a voice is a must for this project I would think, augmented with some facial recognition so it can decide to whom it will threaten to Ex term inate.
A 3D printer will take care of those wheels and mounting brackets etc, highly recommended for this sort of project. Heck, you could print a whole army of the blighters or even life size Dalek:
A fun project 😀, keep posting your updates.
... feel free to post comments or suggestions.
Maybe make it a remote control project perhaps using IR and the IR transmitter keyboard?
https://dronebotworkshop.com/using-ir-remote-controls-with-arduino/
https://roboticsbackend.com/arduino-ir-remote-controller-tutorial-setup-and-map-buttons/
Yes, a 3D printer would make it a lot easier, but I don't have the space, time or money for it right now.
Thanks for the hint with the IR remote, I think I'll add one!
Current projects:
- Modding my Gameboy Advance SP
- Turning Dalek into robot
Finished projects:
- Talking plant monitor (ESP8266)
- Mail box monitor (ESP8266-01S)
Other devices:
- Raspberry Pi 4B 4GB running Home Assistant
Short test if everything works fine with 12.8V attached... (a bit nervous at first since directly connecting to 5V pin): https://youtube.com/shorts/3ztXfIKVfeI
Current projects:
- Modding my Gameboy Advance SP
- Turning Dalek into robot
Finished projects:
- Talking plant monitor (ESP8266)
- Mail box monitor (ESP8266-01S)
Other devices:
- Raspberry Pi 4B 4GB running Home Assistant
@rommudoh Would hot glue work? I use that stuff everywhere. Never had a problem yet.
First computer 1959. Retired from my own computer company 2004.
Hardware - Expert in 1401, and 360, fairly knowledge in PC plus numerous MPU's and MCU's
Major Languages - Machine language, 360 Macro Assembler, Intel Assembler, PL/I and PL1, Pascal, Basic, C plus numerous job control and scripting languages.
Sure you can learn to be a programmer, it will take the same amount of time for me to learn to be a Doctor.
I think hot glue it will be until it requires something better.
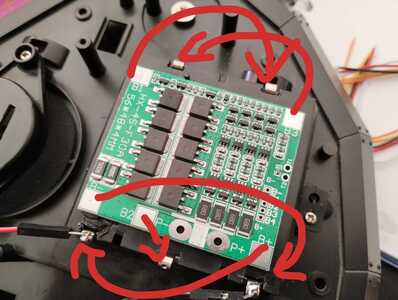
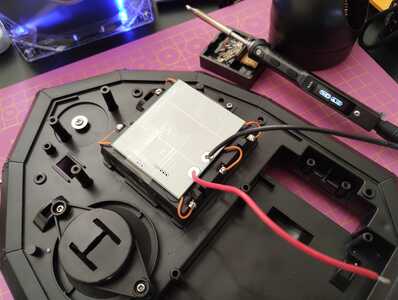
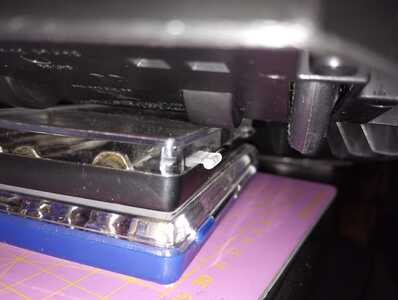
The battery protection board just arrived. At first I was disappointed because the connections are mirrored:
But then I realised I can just put it face down instead. Here's the result after soldering:
I really like how it fits so nicely 🙂
Current projects:
- Modding my Gameboy Advance SP
- Turning Dalek into robot
Finished projects:
- Talking plant monitor (ESP8266)
- Mail box monitor (ESP8266-01S)
Other devices:
- Raspberry Pi 4B 4GB running Home Assistant
A bit of progress today.
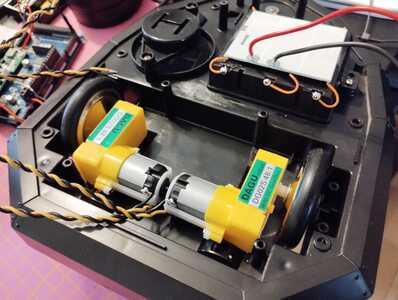
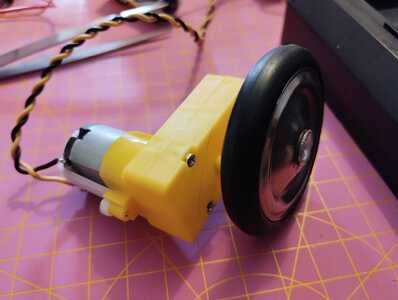
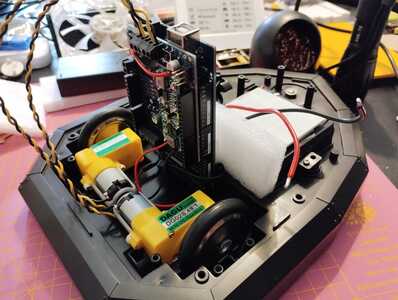
I found some wheels that had about the right size. took them apart and stuck them onto the motors. They barely touch the ground, though. Also, used double sided tape to keep the motors in place - need to find a better solution sometime:
Small proof of concept that it works:
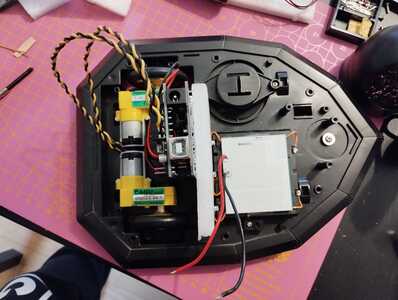
tried out how to place the Arduino into the Dalek. This looks like a nice position and there should be enough space in the top part:
Current projects:
- Modding my Gameboy Advance SP
- Turning Dalek into robot
Finished projects:
- Talking plant monitor (ESP8266)
- Mail box monitor (ESP8266-01S)
Other devices:
- Raspberry Pi 4B 4GB running Home Assistant
In the video demo is it under software control or remote control?
I didn't spend a lot of time in programming, yet, since I wanted to get a usable starting point first. Right now the controller simply drives forwards and then backwards again.
I'm going to change this next, to calibrate it, and control it remotely. IR at first, since I should have everything needed here, but later I'll switch to Bluetooth or WiFi.
Current projects:
- Modding my Gameboy Advance SP
- Turning Dalek into robot
Finished projects:
- Talking plant monitor (ESP8266)
- Mail box monitor (ESP8266-01S)
Other devices:
- Raspberry Pi 4B 4GB running Home Assistant
I just wrote some code for the robot, it can be found here:
https://codeberg.org/rommudoh/Dalek
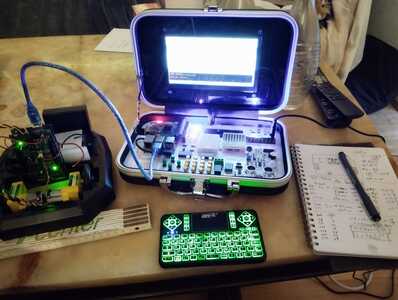
I used my JoyPi that I got for my birthday to do this in my living room:
Sadly, the robot is bad in turning or keeping a straight line, as can be seen here:
It should drive forward 0.5 m, make a 90° turn, and repeat three more times, ideally ending up at the starting point.
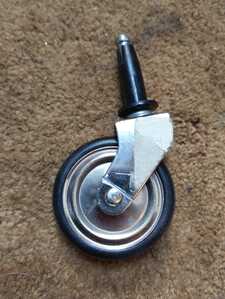
The front wheel seems to be the culprit. Maybe I have to replace it by something better - maybe a ball instead of a caster?
Current projects:
- Modding my Gameboy Advance SP
- Turning Dalek into robot
Finished projects:
- Talking plant monitor (ESP8266)
- Mail box monitor (ESP8266-01S)
Other devices:
- Raspberry Pi 4B 4GB running Home Assistant
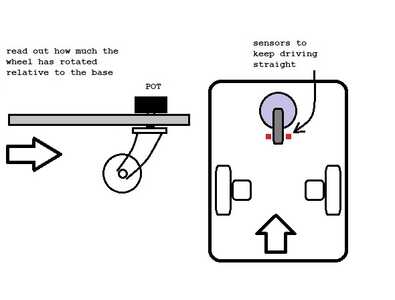
Differential drives are hard to get to work at the same speed. Swivel wheels can effect the robot base. When doing the square mine would jam in the carpet causing the light weight base to do a little jump. I had thought that the front swivel wheel might actually be used to steer the robot in a straight line if you read out how much it has rotated relative to the base. If it is off angle just stop or slow the robot and rotate the base to align the swivel wheel again to the desired angle for straight or some controlled turning maneuver.
It could be said there might be some advantage in having a powered steerable wheel at the front while the back wheels turned freely. The pivot of the front wheel would become the point of reference for the position on the robot base.
To enlarge an image, right click image and choose Open link in new window.
Good progress I see, its moving already 😀
But don't forget the Snowball of Robots mantra:
No robot shall kill any other robot. All robots are equal. Appended to these commandments is the mantra or slogan 'four wheels good, two wheels bad', because robots (who drive on four wheels) are friends while two-wheeled robots, like their two-legged human overlords are evil.
Three wheels, on your waggon, I think the 3rd wheel may work better at the back. But I don't write with any experience, I've only used 4 wheels in skid steer fashion. I hope to try 4 wheels with ackermann steering when I get round to it.
@byron
Having a single steerable motor means you don't have to worry about two motors having the same speed.
Four wheels are certainly more stable although with a robot base close to the floor it doesn't matter.
Of course none of this is relevant to @rommudoh because his project is using the robot base he has.
@rommudoh
The swivel wheel on a robot vacuum cleaner is probably the best design. Maybe you could get one secondhand or new from a retailer. They use a switch on the spring loaded swivel wheel to turn off the motors if the robot is picked up.
Thanks for the suggestions.
I tried the square run again, with the front wheel locked at 90°, and then the turns were very reliable and it ran a straight line, too, maybe with a bit of drag.
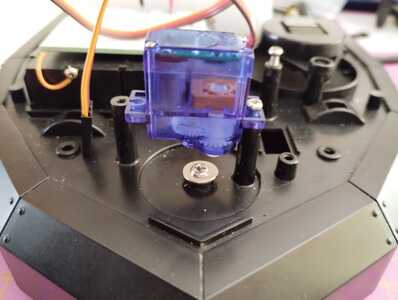
I might have found a different solution. I could place a servo right above the front wheel and have it position the wheel however needed:
Will have to think a bit more about it. I'd like to keep the base as unharmed as possible.
Current projects:
- Modding my Gameboy Advance SP
- Turning Dalek into robot
Finished projects:
- Talking plant monitor (ESP8266)
- Mail box monitor (ESP8266-01S)
Other devices:
- Raspberry Pi 4B 4GB running Home Assistant

