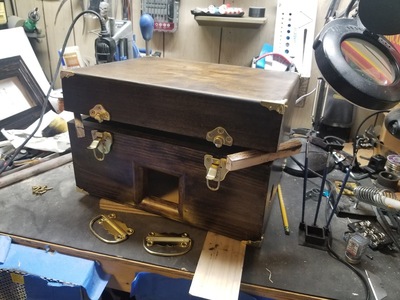
I have a feeling this is going to be a box I'm not going to want to put my hand in.
I'm hoping that it will be very inviting to hands and fingers...
And eyes 😉
The box is looking fit for a King.
Thank You
I see you put fancy corner protectors on all the corners.
All the metal is brass, except for 2 pieces, which I couldn't find in brass, so I'm going to use copper paint (actual copper, not copper colored. Conductive paint made for people with 3D printers who wanna integrate circuitry into their prints) Very cool stuff
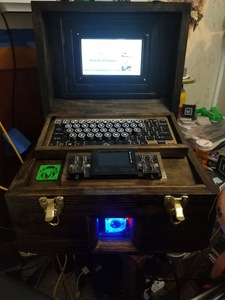
IT'S ALIVE !!!
Sadly, it's gonna stay tethered to the wall until the batteries I ordered show up. I ordered 8 18650's along with an 8 bay charger, and I've already got the buck converters
Yay ! Something I did actually worked !
Now I can get back to failing to make a robot work
Awesome!
That's some really nice craftsmanship there Spyder!
You put that together pretty quickly too. You're calling it a simple project, but for many that would have been a major project.
DroneBot Workshop Robotics Engineer
James
some really nice craftsmanship there
Thank You
You put that together pretty quickly
Ehh, not really. Been planning this for about 6 months. Thinking things thru, and ordering parts, getting everything together til I had all the parts I needed to make it happen.
You may not remember a few months back in one of the 3D printer threads where I was talking about how great carbon fiber was. The picture I posted was the keys I had printed for the keyboard
And a few weeks ago I posted the results of an experiment I was doing concerning how long a 20,000mah battery pack would power the pi4...
That changed my plans a bit
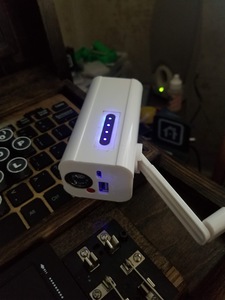
And I've still not figured out how I'm gonna mount THIS puppy into it...
Yea, it needed a crank
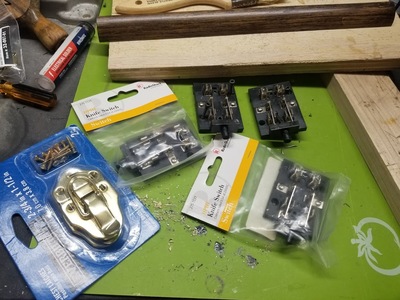
And the knife switches have been hanging on my pegboard since April, just waiting to be mounted in this specific project, while the keyboard, mousepad and monitor have been sitting on my shelf since March
You're calling it a simple project
THAT would be my own personal style of humor. I wanted people to think it was just a box until it was finished.
It's the thing that somebody says in the first scene of the movie, the full weight and consequences of which isn't fully understood until 2 minutes before you walk out of the theater
Whenever I say "that was fun", it's because I'm cutting down a 14 page rant about exactly what a pain and how much effort went into whatever it is I'm talking about
It's my own style of humor, and typically, nobody gets it, which is fine. It saves on the explanations later
for many that would have been a major project
Yea, that's what I was saying. It was
You may not remember a few months back in one of the 3D printer threads where I was talking about how great carbon fiber was. The picture I posted was the keys I had printed for the keyboard
I was going to ask where you got the Steampunk keyboard. ?
I haven't been following the 3D printer threads because I don't have a 3D printer. As much as I would love to have everything, I need to restrain myself in some areas lest I become overwhelmed with more projects than I can deal with. (actually I'm already doing that anyway, but that's a whole other story)
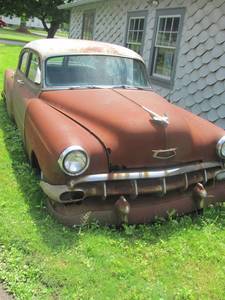
Just as an off-topic aside, last year I bought a 1947 Chevy to restore: Pretty nice find if I do say so myself. It's in really good shape overall, and actually runs! It's all there 100% complete. Just needs to be gone over which I would love to do.
In any case, my point with the above is that I was hoping to work on this Chevy this entire summer and have a nicely restored vintage car to drive by this fall. But real life raised her ugly head and I ended up having to fix tractors, trucks, and my other cars first. So I didn't get to do a doggone thing on my antique car project.
Oh pooh! Maybe I'll have better luck next summer. ?
Whenever I say "that was fun", it's because I'm cutting down a 14 page rant about exactly what a pain and how much effort went into whatever it is I'm talking about
You're supposed to keep that part hidden and hope no one ever discovers it. ? ? ? ?
But yeah, I didn't mean to imply that you achieved your results effortlessly. I'm sure it took a ton of dedicated work, patience, and skill. I still think you did it pretty quickly from the time you started staining the box to the finished product. But then again, I've been pretty busy here so more time may have passed since you started on the box than I realize. It seems like you just started staining the box yesterday, but I guess that was actually a couple weeks ago and I just lost track of time. I never meant to imply that it was simple. That was your choice of description in the thread title. ?
In any case, you have achieved some seriously impressive results in the end. So here's a toast to that accomplishment. ?
DroneBot Workshop Robotics Engineer
James
Again, Thank You
I never meant to imply that it was simple
Heh, no. I did that
I was going to ask where you got the Steampunk keyboard.
3D printed keys glued onto a $10 keyboard. Hand painted the keys and parts of the keyboard, and, after a few tries, created a frame for the keyboard (actually, quite a few tries before I was happy with it)
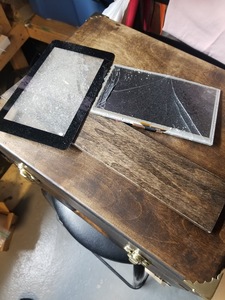
And I also didn't mention the fact that I smashed the monitor while trying to mount it
Really ruined my day. And during a week where they're cutting hours at work so I couldn't afford a new one. Luckily, I had one on the shelf, waiting to be installed in the robot, but since the robot isn't ready, and the laptop was...
Now, of course, I have to order another one for the robot. But at this rate, I won't need it for another year ?
BTW, where do you live ? That car looks like a fun project
3D printed keys glued onto a $10 keyboard. Hand painted the keys and parts of the keyboard, and, after a few tries, created a frame for the keyboard (actually, quite a few tries before I was happy with it)
Nice job! I was thinking of doing something similar. I too like the Steampunk look. I was going to buy a $10 keyboard and make steampunk keys for it from modeling clay since I don't have a 3D printer. Another trick I was thinking about was slicing off thin pieces of copper tubing on my lathe, and then filling them with epoxy. Maybe embedding the key names within the epoxy.
I imagine that we all have these fantasy projects we would love to do but real life necessities keep getting in the way of our dreams. ?
And I also didn't mention the fact that I smashed the monitor while trying to mount it
What a bummer! Sorry to hear about that catastrophe. This reminds me though. I wonder if I could use a display screen from an old broken laptop for the Jetson Nano? I imagine it could be done, but I'm not sure exactly how to go about it.
BTW, where do you live ? That car looks like a fun project
I live in Pennsylvania USA. It's really rare to find an old car in this great of shape in PA as most old cars are totally rotted out from the terrible weather here. But this baby is in really great shape. In fact, I'm still pinching myself over the fact that I found it.
It's a long story. I was actually looking to restore something from the 30's. I even narrowly missed a chance at picking up a 1930 Ford Sedan for only $900. That's a STEAL! The ad just came out and I almost broke my finger pushing the buttons on the phone to call the number. The man answered and say, "Sorry, it's sold. We're filling out the paperwork right now".
Dang@!#*&!
That would have been a great project car. You can't even buy a fiberglass replica body for $900 and this was the real thing with body, frame, and complete drive train and engine! Like I say, $900 was a steal. The guy who sold it obviously had no clue how much it was actually worth. He could have easily gotten $2,500 just as quickly and even then the person buying it would have considered it a steal. You just don't come across 1930 vehicles all that often. Especially ones that are complete with all the glass in the body, etc.
In any case, I was determined to get myself an antique car to restore if it kills me. So I kept looking. I didn't have any particular model or year in mind. I just wanted something that was fairly complete and in restorable condition. So I had Craigslist notify me of any deals. They came and went just like the 1930 Ford sedan. As soon as they appeared they were gone!
Then this one came up and when I called the guy still had it! YIPPEE! I said, "I'll take it!"
He was a very nice person, he explained that it has been garage kept and only driven by a sweet old lady back in a day. ?
He told me that it has all original parts including the engine and that everything runs good and that he just put a newly rebuilt carburetor on it. He also bought a and entire $400 brake system for it that he never got around to installing. All this comes with it, for the asking prices of $1,200. I said, "I'll take it!"
I wasn't even going to think about asking him to take less. From what I had seen you couldn't touch a car like this for less than $2,500 and even that would be a super lucky find! Especially considering the condition this thing is in. I've seen people asking $2,500 for this year and model for cars old rusty cars sitting out in the mud with all the glass broken out, no engine or tranny, and a totally rotted frame. That's no joke either.
This one RUNS! And all the glass is just fine, no broken windows or missing parts.
I'm thrilled! ?
I still pinch myself and keep going out to the garage to see if it's really there. And yippee! It's there! I really got it. It wasn't a dream. I'm as happy as can be. I just hope I live long enough to restore it and actually get to drive it around.
By the way this is the second antique car I bought the same year. The first one is a 1954 Chevy. Again, 100% complete. All the glass windows are in it and all the parts are there including engine, tranny, etc. However, it doesn't run and I'm not sure I can rebuild this engine without sinking a lot of money into it. It sat outdoors for 25 years. The frame is also all rotted out. It's a "major project" car. The good news is that I only gave $200 for it. Plus this engine and transmission will actually fit the 1947 chevy! So if nothing else it will serve as spare parts.
Here's a pic of the $200 nightmare project car. I'm not sorry I bought it. After all it's worth $200 just for parts that can be salvage of it if nothing else.
The thing I found attractive about it is that it's truly 100% there. Everything is original. All the glass is in it. It has the original engine, and standard transmission. Despite how horrible it looks it can actually be restored. Assuming you don't mind making a new frame for it. I actually have a Ford Ranger pick up truck that has a wheelbase that would fit under this 1954 Chevy body. So I might think about making some kind of make-shift rat rod out of it. ?
Just a toy hot rod thingy that looks like a 1954 Chevy.
You'd be hard-pressed to buy just a 1954 Chevy body with all the glass windows for $200. So I don't think it was a mistake to grab up on this when I had the chance. It's was close by so I just bopped over and grabbed it.
Back then I wasn't thinking about robots or I might have bought a Jetson Nano instead. ?
Now I have both. A Jetson Nano and an old rusty 1954 Chevy. I guess I qualify as being GREEDY.
DroneBot Workshop Robotics Engineer
James
I want one.
When I was a kid, my brother restored a 57 Chevy. That was definitely a classic. He had it looking nice and the engine purred.
Have fun with the restoration work.
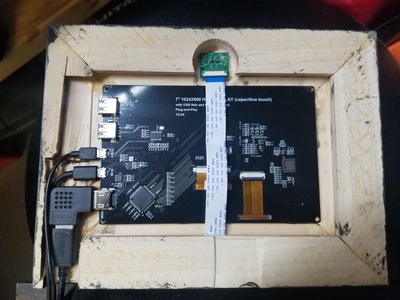
So the batteries showed up, which meant that I had to rip the thing apart to install everything, and since I had it apart, I figured that any laptop worth its salt has to have a webcam in it, so I punched a hole just above the screen for the picam
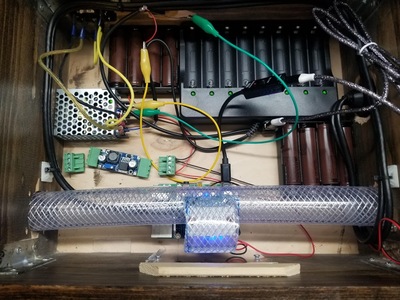
Then I started working out where all the parts should go
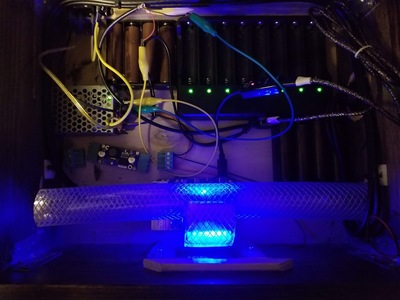
And I noticed that it looks pretty cool in the dark
I went with 2 separate 4 packs, with each of the 4 in series, and then I put the 2 4packs in parallel with each other
I'm not sure what difference it's gonna make with it going thru the buck converter anyway. They better last quite awhile, it took almost a full day to charge them all. And yes, I'm leaving the charger inside the case. I left the keyboard section removable in order to be able to get to it, and the knife switches are gonna switch between the batteries and the 5v power supply. So I can use it while the batteries are charging, but, I can't plug it in if the batteries start to die while I'm using it. I mean I CAN plug it in, but it'll turn off when I throw the knife switch from dc to ac
I considered installing a pi juice hat, but that fan takes up a couple of city blocks. There was just no room for it
i just watched a video of a raspberry pi noaa station and this reminds me alot of that but you know steam punk


