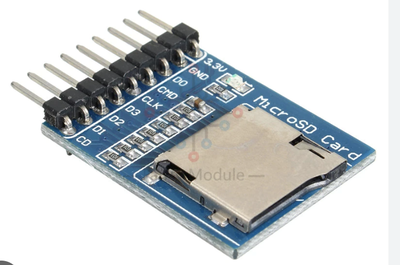
Your wiring seems good, you can probably keep using pin 4 for chip select (or 8 or 10 whichever is most convenient).
I just want to double chec that you're running the SD example codes with no modifications at all (except maybe for the CS/SS pin assignment).
Just confirming, Will, that I am running the SD codes without any alteration other than CS/SS pin assignment.
Unfortunately, I have not been able to obtain much specific information about my Micro SD Card Shield, which is labelled duinotech XC-3852. I attach the information I have.
Yes, I can confirm that there is no useful information available for it. In fact, from what there is on the 'net this module's intended purpose is to expand the storage capability of the XC3802 Wi-Fi Mini Main Board.
Since that board operates at 3.3V, it's possible that it was damaged by the 5V during testing. I don't think the board can be totally ruined though because it still responds during the sketch and it has a labelled 5V input and apparently a labelled 3.3V output.
What OS are you using (Windows or MacOS) ? Can you check the card by mounting on your computer. You'll need to check how it's formatted and also maybe try saving a test text file on the card to prove that the card is OK.
If you can do so from your computer, try erasing the disk and initialize it as FAT16 (I'm not familiar with the app you used to format it originally).
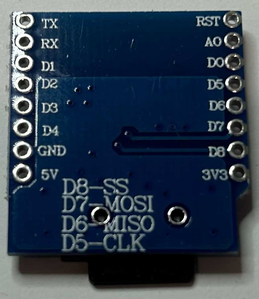
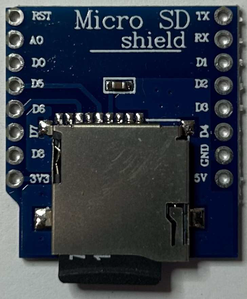
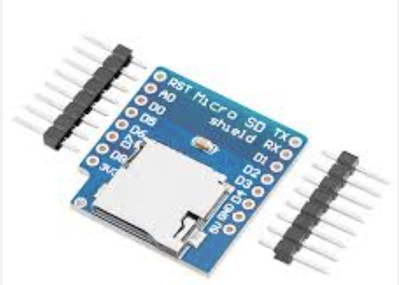
I attach photos of each side of the XC-3852 micro SD card shield I am using.
I am using Windows 10 OS.
I have copied a Word file to the SD card and am able to open it.
I have also formatted my SD card as FAT16, using a procedure (found via Google) entitled FORMAT SD-CARD FAT16 ON WINDOWS10.
Unfortunately, on running the CardInfo sketch I got the same initialization failure report.
Well, sorry but I'm stumped. The connections seem correct, the card is formatted correctly and is available to your computer and you're using an unmodified example sketch.
I've used SD card readers in several of my projects and never had a problem (ahem, once I got the wiring set up properly). I can't say specifically that it's the SD module but that's where I'm leaning. It bothers me that even Amazon sells them for about $3 CAD and these sell for over three times that.
I think, if I were you, that I'd try
1) a different UNO (if you have one) to make sure the UNO's not damaged
2) a different XC-3852 (if you have one) to make sure that module is not damaged
3) a different model of SD card module (maybe a cheap one from Amazon)
Sorry I can't give you a complete solution.
Anything seems possible when you don't know what you're talking about.
@will Thank you, Will.
I think I'll try some new hardware, as you suggest, although one thing that concerns me is the potential for loose connections with the pin and socket system used in the Arduino hardware. Having said that, I guess if it caused consistent issues, someone would have devised a different system.
@shutter-log Can I suggest one crazy idea just in case, make sure the TF card is NOT write protected or locked.
First computer 1959. Retired from my own computer company 2004.
Hardware - Expert in 1401, and 360, fairly knowledge in PC plus numerous MPU's and MCU's
Major Languages - Machine language, 360 Macro Assembler, Intel Assembler, PL/I and PL1, Pascal, Basic, C plus numerous job control and scripting languages.
Sure you can learn to be a programmer, it will take the same amount of time for me to learn to be a Doctor.
@will Thank you, Will.
one thing that concerns me is the potential for loose connections with the pin and socket system used in the Arduino hardware
Excuse me ? What are you talking about - how, exactly are you connecting stuff ? I assumed dupont wires and a breadboard. Is that not the case ?
Anything seems possible when you don't know what you're talking about.
@shutter-log I share your concern and have encountered problems, although probably more the breadboard than the arduino's. If the jumper wires you are using are a smidge undersized (to save $) then it could be a problem. I have pretty much replaced all my bargain basement priced jumper wires for much more expensive jumper wires and not had a problem since.
First computer 1959. Retired from my own computer company 2004.
Hardware - Expert in 1401, and 360, fairly knowledge in PC plus numerous MPU's and MCU's
Major Languages - Machine language, 360 Macro Assembler, Intel Assembler, PL/I and PL1, Pascal, Basic, C plus numerous job control and scripting languages.
Sure you can learn to be a programmer, it will take the same amount of time for me to learn to be a Doctor.
@will My bad, didn't see/read everything I guess.
First computer 1959. Retired from my own computer company 2004.
Hardware - Expert in 1401, and 360, fairly knowledge in PC plus numerous MPU's and MCU's
Major Languages - Machine language, 360 Macro Assembler, Intel Assembler, PL/I and PL1, Pascal, Basic, C plus numerous job control and scripting languages.
Sure you can learn to be a programmer, it will take the same amount of time for me to learn to be a Doctor.
Thank you to all those who have responded since my last post (at 1:15 am - Forum local time, not ours!).
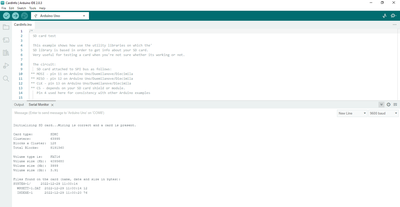
Referring to the first attachment (below), I have at last got what I assume is a positive report using CardInfo and my original hardware (despite having been on a bit of an Arduino shopping expedition today).
I am almost certain the problem was poor electrical connection in my wiring. I have purchased M/M, M/F and F/F jumper sets purportedly designed to suit Arduino breadboard project work, but as I commented earlier, some of those wires - when fitted - seemed looser than I would prefer.
My solution: I used 23AWG, various-colour-insulated single strand "hobby" wire, twitched at my micro SD card shield terminal holes and protected from shorting with heatshrink. The other (plain) end of each wire fitted securely in its respective female receptor on the Arduino Uno board. This attachment to the micro SD card shield is a bit agricultural, but it seems to work.
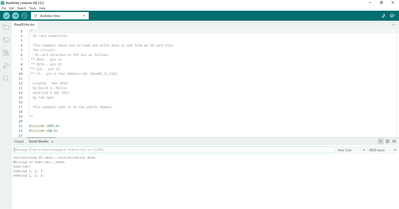
I have also run the ReadWrite sketch and it too seems OK (see attachment below).
Brief update: after completing the above pair of tests, I left Arduino work for a while, then thought I'd better try those tests again to check the reliability of my hardware. Result: another pair of failures!
Suspecting - despite my best wire twitching efforts - that I still had unreliable contacts, I soldered the wires to the Micro SD Card Shield. (By the way, I'm using 3.3v power rather than 5v.)
I have subsequently run two pairs of CardInfo and ReadWrite sketches and each has yielded the same information as that which I attached to my last post.
As a result, I now have a little more confidence in my SD card arrangement.
Thank you all again for your guidance.
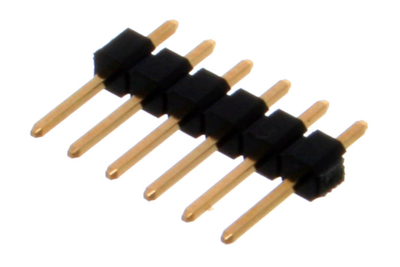
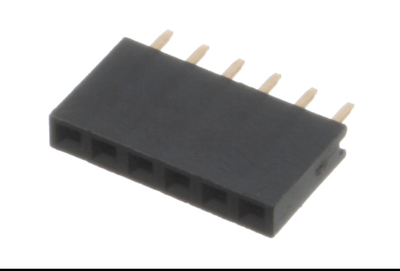
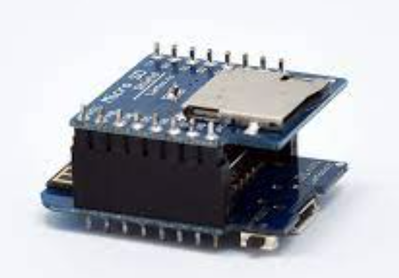
@shutter-log Just to clarify, the photos of the SD card shield you showed here is before you soldered on the dupont headers either male or female? I am also attaching a few pics of various XC-3852 card attachment scenarios. These are not the only ways the XC-3852 can be mounted.
First computer 1959. Retired from my own computer company 2004.
Hardware - Expert in 1401, and 360, fairly knowledge in PC plus numerous MPU's and MCU's
Major Languages - Machine language, 360 Macro Assembler, Intel Assembler, PL/I and PL1, Pascal, Basic, C plus numerous job control and scripting languages.
Sure you can learn to be a programmer, it will take the same amount of time for me to learn to be a Doctor.
Suspecting - despite my best wire twitching efforts - that I still had unreliable contacts
If (by "twitched") you mean that you just twisted the wires together and shoved them into the holes then your results may vary with humidity.
You really need a firm, reliable connection, as you've found out. Good breadboards, wires and solder make for good circuits.
Anything seems possible when you don't know what you're talking about.
@shutter-log Just to clarify, the photos of the SD card shield you showed here is before you soldered on the dupont headers either male or female? I am also attaching a few pics of various XC-3852 card attachment scenarios. These are not the only ways the XC-3852 can be mounted.
Yes, Ron, those photos showed my XC-3852 before I attached my wires. Thank you for the examples of mounting techniques - I'll delve further for more examples. By the way, I like what I'll call your tag lines!
Suspecting - despite my best wire twitching efforts - that I still had unreliable contacts
If (by "twitched") you mean that you just twisted the wires together and shoved them into the holes then your results may vary with humidity.
You really need a firm, reliable connection, as you've found out. Good breadboards, wires and solder make for good circuits.
My 'twitching' method was as follows:
- bare the end of the insulated wire;
- thread it through the respective hole in the card shield;
- carefully 'twitch' the wire with small pliers;
- fit heatshrink to insulate each wire; and
- solder each wire to the hole.
Again, your advice - and your tag line - are both noted, with appreciation.

