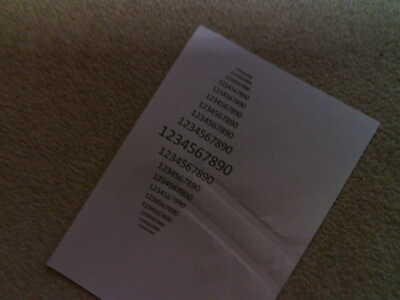
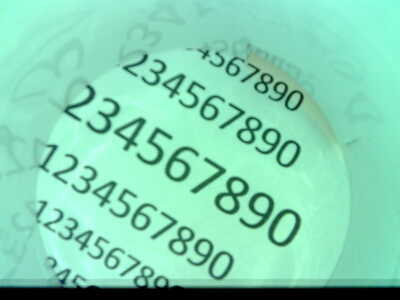
@stefandws ALL the camera settings are the same, both you and I did a file comparison to prove that. Some of the pictures you supplied are showing that either the 'shutter' was triggered early, or something is blocking the lens.
THE ONLY WAY TO TEST THE TWO SKETCHES IS TO LAY THE CAMERA ON A FLAT SURFACE AIMED AT THE CEILING AND YOU STAND 3 FT AWAY WHEN YOU PLUG IN THE USB CABLE AND DO AN UPLOAD.
I also want to clarify some wording. You say 'reset' but in fact the sketch is set up to use GPIO pin 13 as noted in the attached pic. Please verify you have a button connected to ground on 1 side and GPIO13 on the other.
First computer 1959. Retired from my own computer company 2004.
Hardware - Expert in 1401, and 360, fairly knowledge in PC plus numerous MPU's and MCU's
Major Languages - Machine language, 360 Macro Assembler, Intel Assembler, PL/I and PL1, Pascal, Basic, C plus numerous job control and scripting languages.
Sure you can learn to be a programmer, it will take the same amount of time for me to learn to be a Doctor.
Hello Ron,
sorry I am not that fast. I am trying to use the ESP32-cam-device first time
1) there is no error message when brown out is set to 1 or 0 ... no difference
2)
What I would like to see is just lay the camera on the table beside the PC and take a random picture then use the other sketch.
this can be seen in my tests ..
- original "loop" code
( ESP32-CAM Time-lapse camera, esp32cam-timelapse.ino,Takes time-lapse pictures with ESP32-CAM Saves images to MicroSD Card,DroneBot Workshop 2022
https://dronebotworkshop.com
br />delayTime = 10000
camera without yogurt cup housing (distance starting from approx 1m getting closer up to yogurt cup distance) - original "loop" code, camera fixed within yogurt cup housing ... (distance starting from approx 1m getting closer up to yogurt cup distance)
except it is not laying on the table Iam holding the camera in my hands
1) original "loop" code without cup housing .... result is just fine (time-lapse code) ... camera hold within my hands
2) modified loop loop code ... modified camer settings ... camera hold within my hands
the problem is:
the setting has to work within the yogurt cup housing since this exactly fits onto the water meter.
I am trying to get the setting to work in order to take a picture of the water meter once an hour and save the pictures to SD card,
Triggering the camera by rst-button in this setting is just fine!
it is just the automatism that seems to cause trouble for any reason I do not understand
Please don't waste your time with this problem ... I will order a new device and will report back in a couple of days when I have tested same settings with the new device.
If the other device is causing the same result.... (that is what I am expecting) then it has to be a software setting problem ... at least for my understanding
we will see ... I will report
Thanks for your help and get well soon!!
Stefan
I also want to clarify some wording. You say 'reset' but in fact the sketch is set up to use GPIO pin 13 as noted in the attached pic. Please verify you have a button connected to ground on 1 side and GPIO13 on the other.
I am just using the "devices":
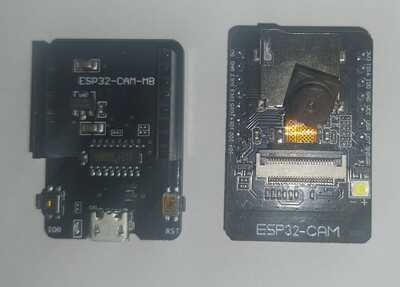
ESP32-CAM plugged into ESP32-CAM-MB
The MB has two buttons ...
a) labeled RST
b) IO0
by pressing RST the system restarts and takes a perfect picture of the watermeter
@stefandws But you are forgetting both you and I did a file compare and the camera code is identical for both sketches.
The difference is one is done in setup, the other in the loop. This may have power implications that is why a better power supply is needed, do NOT use your PC to power the camera unless it is at least USB3.1
Also have you looked at the board errata, I glanced at it yesterday and saw some mention of issues in sleep mode.
You didn't answer my question re Reset button vs GPIO13. The sketch is using GPIO13, that is how you can take multiple shots with the sketch you call 'reset'. If that is the one working for you then connect a RTC board to pin 13 and set it to trigger the pin once an hour. Problem solved other than modifying the SD card writing to auto-increment like the elapsed timer code does. It's a simple copy and paste.
As far as ordering another board, if it comes from the same supplier/manufacturer it will be the same as what you have. We certainly have heard of these clones being flawed, but I doubt that is what is happening here.
One critical fact you are overlooking is that in the batch of what you call 'bad' pictures, I see plenty of evidence of 'normal' pictures except the lens is either blocked or the shutter is slow.
I am very sure this is a user error, not a code error.
First computer 1959. Retired from my own computer company 2004.
Hardware - Expert in 1401, and 360, fairly knowledge in PC plus numerous MPU's and MCU's
Major Languages - Machine language, 360 Macro Assembler, Intel Assembler, PL/I and PL1, Pascal, Basic, C plus numerous job control and scripting languages.
Sure you can learn to be a programmer, it will take the same amount of time for me to learn to be a Doctor.
@stefandws The code to do a reset in software is ESP.restart
For your project, simply change the delay to be 60 mins * 60 secs/min * 1,000ms/sec or 3,600,000ms
Now just copy the SD card writing code from the time lapse to the other sketch. Easy peasy!
To test, use delay(60000) for once a minute or even less if you want.
NOTE: The ESP.restart(); statement must be the last one in the setup proc.
for further details see HERE
void setup(){
Serial.begin(115200);
Serial.println("Restarting in 10 seconds");
delay(10000);
ESP.restart();
}
void loop() {}
First computer 1959. Retired from my own computer company 2004.
Hardware - Expert in 1401, and 360, fairly knowledge in PC plus numerous MPU's and MCU's
Major Languages - Machine language, 360 Macro Assembler, Intel Assembler, PL/I and PL1, Pascal, Basic, C plus numerous job control and scripting languages.
Sure you can learn to be a programmer, it will take the same amount of time for me to learn to be a Doctor.
ESP.restart();
I think this is the magical line.
Pictures taken are now ok ... but it generates no new pictures ... it is always overwriting same picture on the SD-card
I think this was the magic line .... I will try later and to look into how the filenames are generated.
but I must leave for now ... will try later
THANK YOU!!!!
@stefandws I modified the reset code and it compiles as the ESP object is part of the esp32 hardware library. Just add an #include "esp.h" at the top of the sketch. I will do a quick copy/paste of the SD card logic and then give this code back to you. This code is the version that takes a good picture after a reset, and writes those pictures to an SD card. Give me a few moments.
First computer 1959. Retired from my own computer company 2004.
Hardware - Expert in 1401, and 360, fairly knowledge in PC plus numerous MPU's and MCU's
Major Languages - Machine language, 360 Macro Assembler, Intel Assembler, PL/I and PL1, Pascal, Basic, C plus numerous job control and scripting languages.
Sure you can learn to be a programmer, it will take the same amount of time for me to learn to be a Doctor.
Hi Ron @zander and @stefandws,
Ron, I hope you are feeling better ... that is the most important thing!
------------------
As I said, (Ron) you have much more experience of this device than I have. I was only trying to shed a little light on the problem .. pun intended 😀
It is sometime since I played with ESP32 CAM, but I do recall seeing the LED come on under some conditions ... albeit unfortunately, I don't remember the details, but I had a feeling it might have been related to the reset button. As I am not that familiar with all of the supporting library camera code, it occurred to me there might be some automatic LED 'flash' mode, so it might not need any explicit user code.
I am not clear what light source is available to the camera in its yogurt pot 'shed'. I recall the standard 'CAM' that comes with the ESP32 CAM needs reasonably well lit conditions to produce even a 'passable' image quality.
As the images seem to include 'over exposure' and 'under exposure', sometimes apparently acheving both in the same image, and remembering it takes a significant time to read out all of the pixels from a frame, I was left wondering if the picture was in effect the combined result of two or more frames, each frame contributing a horizontal band of the image, some with LED on, others with it off. Of course, this was all speculation, and may be total nonsense, but my approach to problems like this is to suggest a plausible explanation, and then look for evidence to support or reject the suggestion.
I merely suggested that the @stefandws tried providing adequate, constant lighting to see if it changed the problem .. which is somewhat similar to your suggestion of taking pictures into the room, as they are both ways of reducing any effect of the local LED lighting. Neither suggestion is a direct 'cure' for the problem - they are both about trying to find out how the 'weird' images are occurring.
Best wishes and take care my friend, Dave
@davee Stefan is highly resistant to following instructions. I agree with most of what you said other than the ESP32CAM LED being involved. I will try to find an example of LED usage but that is lower priority. I am giving up trying to teach and just giving him one possible solution.
First computer 1959. Retired from my own computer company 2004.
Hardware - Expert in 1401, and 360, fairly knowledge in PC plus numerous MPU's and MCU's
Major Languages - Machine language, 360 Macro Assembler, Intel Assembler, PL/I and PL1, Pascal, Basic, C plus numerous job control and scripting languages.
Sure you can learn to be a programmer, it will take the same amount of time for me to learn to be a Doctor.
@stefandws Here is the sketch I created that should have incrementing file names. If not, you can fix that part.
First computer 1959. Retired from my own computer company 2004.
Hardware - Expert in 1401, and 360, fairly knowledge in PC plus numerous MPU's and MCU's
Major Languages - Machine language, 360 Macro Assembler, Intel Assembler, PL/I and PL1, Pascal, Basic, C plus numerous job control and scripting languages.
Sure you can learn to be a programmer, it will take the same amount of time for me to learn to be a Doctor.
Hi Ron @zander,
Good to hear from you ... hope you are taking it easy.
The LED suggestion may be a complete red herring .. I can't see his kit and I have a few of my own things to be getting on with, so I am not keen to reproduce the whole experiment. It was just a thought.
Looks like you might have found a way round the problem ... if so, well done.
Take care, Dave
@davee Yep, got lucky again. The more I read the docs, the luckier I get.
Just an FYI, here is how the onboard LED is managed. I have one camera sketch that uses the LED under web control
#ifdef CONFIG_LED_ILLUMINATOR_ENABLEDvoid enable_led(bool en){ // Turn LED On or Offint duty = en ? led_duty : 0;if (en && isStreaming && (led_duty > CONFIG_LED_MAX_INTENSITY)){duty = CONFIG_LED_MAX_INTENSITY;}ledc_set_duty(CONFIG_LED_LEDC_SPEED_MODE, CONFIG_LED_LEDC_CHANNEL, duty);ledc_update_duty(CONFIG_LED_LEDC_SPEED_MODE, CONFIG_LED_LEDC_CHANNEL);ESP_LOGI(TAG, "Set LED intensity to %d", duty);}#endif
As far as illness. I have been referred to the appropriate doctor. No idea how long I have to wait. There is a chance they are barking up the wrong tree based on what I know about my body. My Dr does not know what I know but I may not have told him.
Diet has improved me to the point I can work a little bit each day but it's a battle.
I may have not mentioned I am dealing with Iron Deficiency Anemia, and besides taking Iron supplements and some diet changes I just have to wait for a phone call. They think it's a scope and repair job so I will walk out of the hospital cured so to speak. If however, they find nothing as I suspect I am in for a bit of a rough time, abdominal surgery at 81 is a bit of a bother.
My other major health issue is AFIB and I am getting some tests done. It may only result in medication change or may not. My attacks happen about once a month and usually last a day. I can live with that.
Once the IDA is resolved (can take 3 to 6 months) I should have a lot more energy so I will be able to get more done at the bench and provide more help here.
First computer 1959. Retired from my own computer company 2004.
Hardware - Expert in 1401, and 360, fairly knowledge in PC plus numerous MPU's and MCU's
Major Languages - Machine language, 360 Macro Assembler, Intel Assembler, PL/I and PL1, Pascal, Basic, C plus numerous job control and scripting languages.
Sure you can learn to be a programmer, it will take the same amount of time for me to learn to be a Doctor.
@stefandws You don't need the restart in your sketch, the loop procedure accomplishes it, all you need to do is move code around so that code that is only needed once is in setup, and code needed each picture is in loop. Look at my code I sent you.
Here is my quick answers to your questions
logging additional information on the SD-CARD additional to the images stored on the SD-card .. instead of using the serial monitor while board is connected to PC
Yes, you can, but you will need to study file system concepts to determine how to do this.
how to reset the counter to zero
Just assign 0 to the counter as in myCounter = 0;
how to reduce (set) LED-flash light (brightness)
That might not be very easy, you need to know how to find things in the system, not just code, but the doc'n as well. I just had a quick look because I have looked at it before and I don't see a quick easy path. Make this low priority.
how to best continue in order to find optimal camera settings (... setting values of the camera
parameters by changing variables over time ... "for/next loop" ... with parameters logged to SD-card
I do not recommend for next, change one setting at a time.
The settings you inherited are optimal, but if you want to play, change ONE at a time, like brightness until it looks good to you, then move on to contrast etc.
First computer 1959. Retired from my own computer company 2004.
Hardware - Expert in 1401, and 360, fairly knowledge in PC plus numerous MPU's and MCU's
Major Languages - Machine language, 360 Macro Assembler, Intel Assembler, PL/I and PL1, Pascal, Basic, C plus numerous job control and scripting languages.
Sure you can learn to be a programmer, it will take the same amount of time for me to learn to be a Doctor.
@stefandws You don't need the restart in your sketch, the loop procedure accomplishes it, all you need to do is move code around so that code that is only needed once is in setup, and code needed each picture is in loop. Look at my code I sent you.
I am not sure if I do understand what you are saying
but if I move the RESTART from within the loop to the end of procedure setup() the pictures are of no use just as before.
I think I have to stay leaving restart within the loop .. this seems to work just fine
void setup() {


  // Disable brownout detector
  WRITE_PERI_REG(RTC_CNTL_BROWN_OUT_REG, 0);


  // Start Serial Monitor
  Serial.begin(115200);


  // Initialize the camera
  Serial.print("Initializing the camera module...");
  configESPCamera();
  Serial.println("Camera OK!");

  // Initialize the MicroSD
  Serial.print("Initializing the MicroSD card module... ");
  initMicroSDCard();

  // initialize EEPROM with predefined size
  EEPROM.begin(EEPROM_SIZE);
  pictureCount = EEPROM.read(0) + 1;

  Serial.println("Restarting in 10 seconds");

  delay(10000);

  ESP.restart();

}
Having ESP.restart() within the loop .. the result is perfect!
void loop() {


  // Path where new image will be saved in MicroSD card
  String path = "/image" + String(pictureCount) + ".jpg";
  Serial.printf("Picture file name: %s\n", path.c_str());


  // Take and Save Photo
  takeNewPhoto(path);


  // Update EEPROM picture number counter
  EEPROM.write(0, pictureCount);
  EEPROM.commit();


  // Delay for specified period
  delay(delayTime);


  ESP.restart();
}


