Hi, I am new to coding, so I download all of my projects, could you please help me with issues with what I downloaded, when I vertified the code on my Arduino it said - SSD1306 display (0x3x, D3, D5, ); but an error message said D3 was not declared in this scope, can you please help me.
Many Thanks No Hair
That type of error usually indicates that you forgot to declare the variable D3. A variable must be defined and given a value before you can use it in the setup or loop functions.
--->Sean
(◕(' 人 ') ◕)
Many thanks, but how do I do that, can you please do a diagram, its just I do struggle with programming a lot as you can see.
Many Thanks No Hair.
int D3 = 0;
void setup() {
// put your setup code here, to run once:
}
void loop() {
// put your main code here, to run repeatedly:
D3 = D3 + 1;
}
(◕(' 人 ') ◕)
Our good friend Paul McWhorter has an excellent series of YouTube videos that will teach you everything you need to know about programming Arduino sketches. Head on over!
https://www.youtube.com/user/mcwhorpj
--->Sean
(◕(' 人 ') ◕)
Thanks for the info, I have watched Paul McWhorter, he is good and the codes I have used from him I have had luck with. I am sending you the code that I am having trouble with,
#include <Wire.h>
#include "SSD1306.h"
#define BLYNK_PRINT Serial


#include <ESP8266WiFi.h>
#include <BlynkSimpleEsp8266.h>

// You should get Auth Token in the Blynk App.
// Go to the Project Settings (nut icon).
char auth[] = "XXXXXXXXXXXXXXXXXXXXXXXXXXXXXX";

// Your WiFi credentials.
// Set password to "" for open networks.
char ssid[] = "XXXX";
char pass[] = "XXXXXX";

#include <DHT.h>

#define DHTPIN 4 // what pin we're connected to
#define DHTTYPE DHT11 // DHT 11

// Initialize the OLED display i2C
// D3 -> SDA
// D5 -> SCL

// Initialize the OLED display using Wire library
SSD1306 display(0x3C, D3, D5);

DHT dht(DHTPIN, DHTTYPE);
BlynkTimer timer;
void setup(){
Serial.begin(115200);
// Initialising the UI will init the display too.
display.init();

display.flipScreenVertically();
display.setFont(ArialMT_Plain_16);
display.setTextAlignment(TEXT_ALIGN_LEFT);
dht.begin(); // initialize dht

Blynk.begin(auth, ssid, pass, "blynk-cloud.com", 8080);
timer.setInterval(1000L, sendSensor);
}

Hope you can help.
Many Thanks No Hair.
// Initialize the OLED display i2C
// D3 -> SDA
// D5 -> SCL
I think what you're supposed to do here is add what pins you're going to use for D3 and D5. It's asking for the D3 pin to be a SDA pin and the D5 an SCL pin.
Of course, I have no idea what I'm talking about so if someone else has a better suggestion, please jump in.
Cheers!
--->Sean
(◕(' 人 ') ◕)
The compiler expects D3 and D5 to be defined, but the error says they are not. The code in question that is failing:
SSD1306 display(0x3C, D3, D5);
What board did you select in the Arduino IDE and what board are you actually using? It's obviously an ESP8266 of some kind.
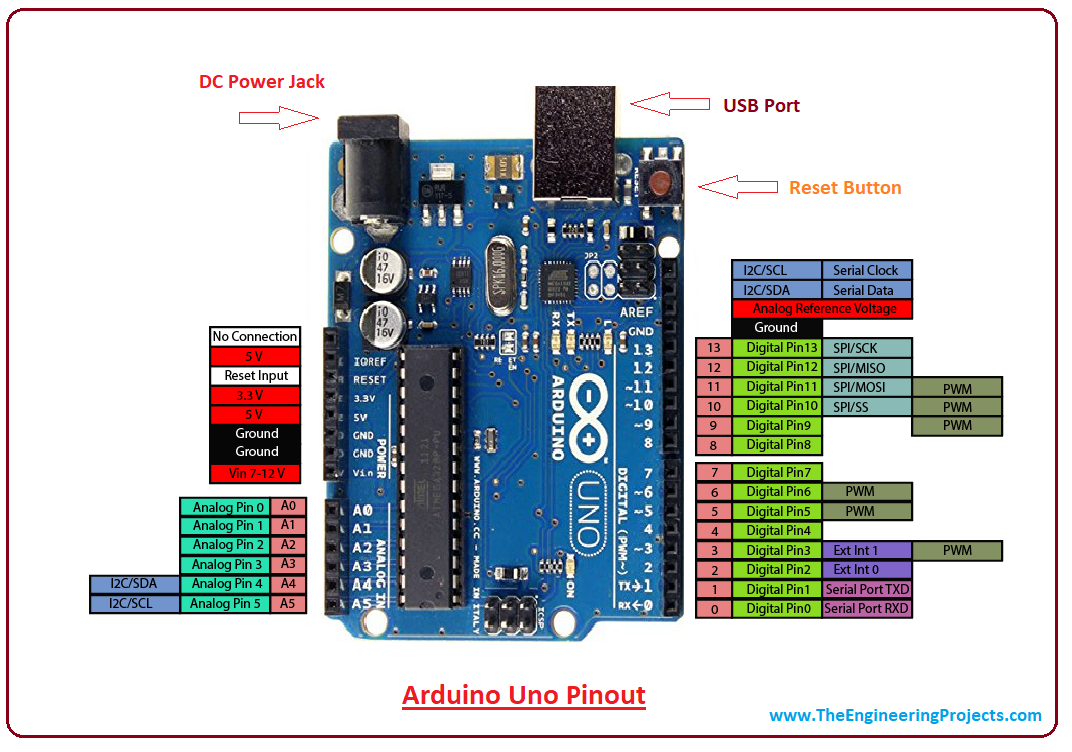
Pin names are defined in Arduino for each board. Perhaps D3 and D5 aren't the real names of pins? You need to refer to the pin diagram for your board to work out what its names and numbers are.
Many thanks for your help, I am using a Arduino uno, I will try and see what happens.
Many thanks No Hair.
Sorry, it`s a ESP 8266, I got that wrong in message.
No problem, do you know what kind? Try to find a pin diagram for it. For example:
https://randomnerdtutorials.com/esp8266-pinout-reference-gpios/
Sorry, it`s a ESP 8266, I got that wrong in message.
Adafruit notes on their github readme under compatibility that is was tested on the ESP 8266 but adds "Change OLED_RESET to different pin if using default I2C pins D4/D5". But it looks like you might be using a different library. More info on the brand of LCD you have would help. Also, load the example sketch and see if you can get that to work. Aslo, you have the pins commented out. They need to be defined before that.
So pm that board, you'd use D1 for SCL and D2 for SDA.
Sometimes, it's better to start simple and then work your way to more complex. Try doing something simple with D1 and D2 like attaching a pair of LEDs and using the program to turn them off and on. Then once you're comfortable working with them, you can start using the I2C functions.
Good luck!
--->Sean
(◕(' 人 ') ◕)


