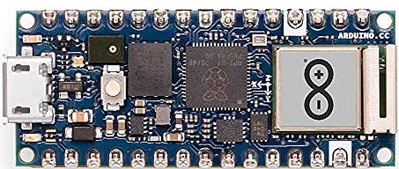
Let’s get started with the new Arduino Nano RP2040 Connect, an Arduino board with a Raspberry Pi RP2040 MCU.
The highly-anticipated fusion between Arduino And Raspberry Pi has finally arrived!
The Arduino Nano RP2040 Connect board fuses a Raspberry Pi RP2040 MCU with an ESP32-based WiFi & Bluetooth Module, a MEMS Microphone, an IMU with Machine Learning capabilities, extra Flash memory, and a Cryptographic Coprocessor. All in the same form-factor and pinout as the original Arduino Nano.
This powerful little board brings the power of the new RP2040 microcontroller to the Arduino ecosystem. And with the addition of WiFi and Bluetooth, along with a number of advanced onboard peripherals, this little board is certain to find a myriad of uses.
Today we will take a first look at the Arduino Nano RP2040.
After examining the board's many advanced features we will set up our Arduino IDE to work with our new microcontroller. Linux users will want to make note of a possible bug in the installation process, but don’t worry, I have a simple fix for that.
Once we have the IDE up and running and have tested out the board with the usual Blink sketch we will run a few Arduino-supplied experiments to get a feel for using some of the Nano RP2040’s advanced features.
The Arduino Nano RP2040 Connect has an onboard RGB LED, and in our first experiment we will create a WiFi Access Point with a web page that will allow us to control the Red, Green, and Blue segments. You can use this simple sketch as the basis for more advanced remote control applications.
Next, we will put the 6-axis IMU (Inertial Measurement Unit) to the test by exploiting one of its most unique features - built-in Machine Learning. We will use this to build a motion sensor that can determine whether we are stationary, walking, jogging, cycling, or driving. As I’m doing this in the confines of my workshop I'll just have to shake the board to simulate walking and jogging!
And finally, we will use the onboard MEMS Microphone to control the blue segment of the RGB LED by clapping - similar to the old “Clapper” device from the 1980s!
Here is the Table of Contents for today’s video:
00:00 - Introduction
01:55 - Arduino Nano RP2040 Connect Intro
06:12 - Look at Nano RP2040
08:48 - Installing the Boards Manager
09:39 - Linux Post Install
12:58 - Blink Test
15:00 - Web Server AP Mode Demo
22:01 - IMU Machine Learning Core Demo
29:31 - Reading Microphone Data Demo (“Clapper”)
35:59 - Conclusion
Hope you enjoy the video!
"Never trust a computer you can’t throw out a window." — Steve Wozniak
Great video, Bill! Thanks.
Imagine by thought, create, don't wait, Scott.
Hi Bill, very helpful video and workshop tutorial, thanks for the introduction to the RP2040 Connect and for walking us through the process of installation and use. A special thanks for providing the solutions for the linux compatibility issues. I just ordered the board via your link, so these tips will come in very handy.
No idea just how I'm going to put this nano giant to work, but I've got plenty of time to figure that out, while I learn how it works. Should be a fun learning experience, I'll probably have questions.
Spudger
The rocket worked perfectly, except for landing on the wrong planet.-
Wernher Von Braun
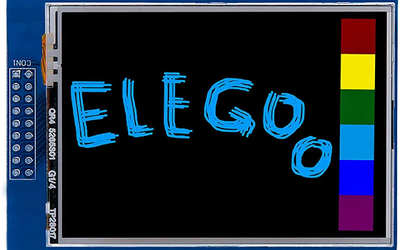
In trying to picture what practical applications, this little board has, I got to thinking about how to go about connecting up the Elegoo TFT Touchscreen to the Nano RS2040. I'll have to do some research on that. If anyone has a clue ...
I don't have the board or the touchscreen yet, but I'm guessing it should connect up Ok, then again, it's all guesswork at this stage of the game.
Spudger
The rocket worked perfectly, except for landing on the wrong planet.-
Wernher Von Braun


